Description
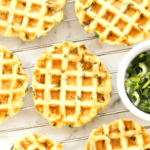
Use up your leftover mashed potatoes to make these simple but tasty mashed potato waffles that make an amazing breakfast or brunch! The batter is quick to prepare and the waffle iron does all the cooking! Totally gluten-free and dairy-free too!
Ingredients
- 2 cups mashed potatoes
- 2 tablespoons melted vegan butter + more for brushing waffle iron
- 2 large eggs, beaten
- 1 1/2 teaspoon salt
- 1/4 cup unsweetened dairy-free yogurt
- 1/2 cup gluten-free all-purpose flour blend
- 1/2 cup chopped green onions
Instructions
- Preheat Waffle Iron: Preheat your waffle maker until the green indicator light turns on (which means the iron is hot enough to be used).
- Mix Ingredients to Form Waffle Batter: In a large bowl, mix the mashed potatoes, butter, salt, eggs, yogurt, gluten-free flour, and chopped green onions together until you get a homogeneous batter
- Cook Waffles: Brush top and bottom sides of waffle iron with a bit of melted butter, and pour 1/3 cup of batter onto the surface of the oiled waffle iron. Close waffle iron and allow batter to cook for around 4-5 minutes, or until you see steam coming out from the sides of the waffle maker.
- Repeat Until Batter is Finished: Repeat until all batter is used (Place cooked waffles in oven at 300 deg Fahrenheit (150 deg. Celsius) to keep warm until all batter has been used up.
- Drizzle with Sauce and Enjoy: Serve waffles with sauce of choice.
Notes
Mashed Potatoes: I recommend using real mashed potatoes (as opposed to powdered mashed potatoes) for best results. You can either make a fresh batch of mashed potatoes for this, or use leftover mashed potatoes (either works)!
Vegan Butter: I used vegan butter to keep this recipe dairy-free. You may also use melted coconut oil as well (I prefer to use refined coconut oil, which is more neutral in flavor, as opposed to extra virgin coconut oil, which has a stronger and more pronounced coconut smell and taste). Alternatively, if you are not lactose-intolerant, feel free to use normal butter instead.
Eggs: The eggs help to bind the waffle batter together, and are important in this recipe. I personally have not tried making this recipe without eggs, so I don’t know how that would turn out. However, if you are allergic to eggs, you may try substituting the eggs with acquafaba or an egg-replacer. (If you do make this recipe without eggs, please let me know in the comments how it goes, I’d love to know!)
Dairy-Free Yogurt: I used dairy-free yogurt to keep this recipe dairy-free. However, if you are not lactose-intolerant, feel free to use normal Greek yogurt instead.
Gluten-Free Flour: I used a gluten-free all-purpose flour blend, but feel free to use tapioca starch or arrowroot starch instead. If you are not Celiac or gluten-intolerant, go ahead and use normal flour instead.
Green Onions: I like adding green onions for extra flavor and taste. You may also use chives or other fresh herbs (such as thyme or chopped rosemary).
Roasted Red Pepper Sauce: Roast 2 red bell peppers (stems and seeds removed) in the oven at 400F for 20 minutes until the skins start to turn dark. Combine the roasted red peppers, 6 tablespoons water, 2 1/2 tablespoon olive oil, 2 tablespoons unsweetened dairy-free yogurt, and 2 teaspoons of salt in the bowl of your food processor or blender. Blend until you get a thick and homogeneous orange mixture. Add more salt as needed and serve drizzled over the mashed potato waffles.
Cook Until Steam Comes Out: To best way to ensure that the waffles are fully cooked and that they won’t stick to the waffle iron is to cook the waffle batter (without opening the waffle maker) until you see steam coming out from the sides of the waffle maker.
Storing/Freezing: To store, place the cooled mashed potato waffles in an airtight container and store in the refrigerator for up to 3 days. Reheat in a toaster, skillet or in the oven. To freeze, place the waffles (separating each waffle with a plastic sheet) in a ziplock bag or freezer-safe container and freeze for up to 2 months.Reheat in a toaster, skillet or in the oven.
This recipe was originally posted in 2016, but has since been republished to include clearer step-by-step instructions, as well as recipe notes and substitutions.
Barely adapted from: Healthy Nibbles & Bits
- Prep Time: 5 mins
- Cook Time: 40 mins
- Category: Brunch
- Method: Waffle Maker
- Cuisine: Western


