Description
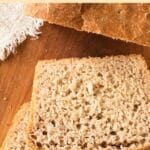
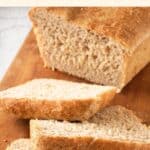
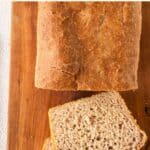
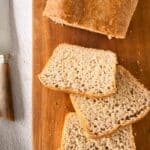
Soft, fluffy and tender, this gluten-free beer bread is delicious toasted with butter and jam, or for making sandwiches! Totally dairy-free too! Go bake a batch to enjoy homemade gluten-free bread today!
Ingredients
- 3 cups gluten-free all-purpose flour
- 3/4 teaspoon xanthan gum (omit if your gluten-free flour blend already includes it)
- 1 teaspoon baking powder
- 2 tablespoons psyllium husk powder
- 2 1/4 teaspoons (10g) instant dry yeast
- 1 tablespoon white sugar
- 1 teaspoon salt
- 1 3/4 cup (approx. 14oz) gluten-free beer, room temperature
- 2 eggs, room temperature, beaten
- 1/4 cup vegetable oil
Instructions
- Grease: Grease a 9” x 5” metal loaf pan with nonstick baking spray.
- Whisk Dry Ingredients: In a large mixing bowl, combine the gluten-free all-purpose flour, xanthan gum (if using), baking powder, psyllium husk powder, instant dry yeast, sugar and salt. Whisk well to combine.
- Add Wet Ingredients: Add the gluten-free beer, eggs and vegetable oil. Mix well until you get a wet and shaggy dough that resembles cake batter.
- Transfer Dough to Pan: Transfer the gluten-free bread dough to the previously greased loaf pan.
- Let Dough Rise: Cover the pan with a clean kitchen towel and let the dough rise until roughly doubled in size in a warm, draft-free area (approximately 30 minutes). Make sure the dough doesn’t rise more than the top of the pan.
- Preheat Oven: While dough is rising, preheat the oven to 350F.
- Bake Until Golden: Once the dough has risen to double its size, bake in the preheated oven for 60 minutes, until the loaf is golden brown on top and sounds hollow when tapped. Remove loaf pan from the oven.
- Let Cool before Slicing: It’s very important to let the loaf cool for at least 30 minutes before slicing as the inside of the loaf will continue cooking with the residual heat even after you remove it from the oven.
Notes
Gluten-Free Flour: I strongly recommend using a good-quality gluten-free all-purpose flour that is made up of lighter flours/starches (such as rice flour, tapioca starch, corn starch or potato starch) as that will result in a lighter and fluffier final texture. I do NOT recommend using a gluten-free flour blend that is made up of heavier flours (such as garbanzo bean flour) as that will result in a heavier final texture.
Xanthan Gum: Xanthan gum is the replacement for gluten in gluten-free flours and helps the ingredients to better bind together. If your gluten-free blend does not already include xanthan gum, make sure to add it in.
Baking Powder: Baking powder adds additional rise to the dough. If you are Celiac or gluten-intolerant, make sure to use certified gluten-free baking powder.
Psyllium Husk Powder: Psyllium husk powder adds elasticity and helps the bread to keep its rise. Make sure to use psyllium husk in powder form. If you only have whole psyllium husks, you can grind it with a coffee grinder until super fine.
Instant Yeast: I used instant dry yeast which does not require pre-activation for the yeast to work. If you only have active yeast, make sure to activate the yeast first (by mixing it with warm water and sugar and letting it sit in a warm place for 5 minutes until it is foamy) before adding it to the rest of the ingredients.
Sugar: The sugar is food for the yeast to feed on in order to be activated and create the air bubbles required for the dough to rise. I used white sugar, but cane sugar or brown sugar will work just as well.
Beer: I used gluten-free beer to keep this beer bread gluten-free. However, if you are not Celiac or allergic to gluten, feel free to use regular beer instead.
Eggs: Eggs help to bind the ingredients better, as well as aids in the rise of the dough. If you are allergic to eggs, or would simply prefer to keep this recipe egg-free, you can try using acquafaba or an egg-replacer.
Oil: I like using sunflower oil because I always have a bottle of it on hand. However, you can also use another other type of vegetable oil (such as canola oil, olive oil, avocado oil etc).
Storing/Freezing: To store, cover the cooled gluten-free beer bread with plastic wrap or place it in an airtight container and store in the refrigerator for up to 1 week. To freeze, cover the loaf with various layers of plastic wrap and freeze for up to 2 months in the freezer. (I recommend slicing the loaf into even slices before freezing so you can thaw slices as necessary).
- Prep Time: 10 mins
- Rising Time: 30 mins
- Cook Time: 60 mins
- Category: Bread
- Method: Baking
- Cuisine: Western