Description
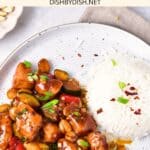
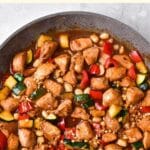
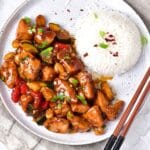
Spicy and flavorful, this gluten-free kung pao chicken is delicious over a bed of white rice. It’s a perfect meal for when you’re craving Asian food, and tastes even better than takeaway! Totally dairy-free too!
Ingredients
- 16 oz boneless skinless chicken breast, diced
- 2 tablespoons sunflower oil
- 1 zucchini, diced
- 1 red bell pepper, diced
- 3 tablespoons peanuts
- 3 tablespoons chopped green onions, for serving
- 1 tablespoon chili flakes, for serving
For the Marinade:
- 4 tablespoon gluten-free soy sauce
- 1 teaspoon brown sugar
- 3 tablespoons white wine
For the Kung Pao Sauce:
- 3 tablespoons oyster sauce
- 3 tablespoons gluten-free soy sauce
- 2 tablespoons sesame oil
- 2 teaspoons minced garlic
- 2 teaspoons minced ginger
- 1 teaspoon brown sugar
- 1 tablespoons cornstarch
Instructions
- Marinate Chicken: Mix the ingredients for the marinade (gluten-free soy sauce, brown sugar and white wine) in a ziplock bag and place the chicken in it. Let the diced chicken breast marinate in the refrigerator for at least 30 minutes to one hour.
- Sauté Chicken: In hot frying oil, fry the chicken cubes for 7 minutes, stirring occasionally, over medium heat. It is important that each piece is covered with a crust. Transfer the chicken to a plate and set aside.
- Prepare the Kung Pao Sauce: In a bowl, mix the oyster sauce, gluten-free soy sauce, sesame oil, minced garlic, minced ginger and brown sugar. Mix well to combine. Dissolve the cornstarch in 2 tablespoons of hot water and then add it to the sauce as well.
- Stir Fry Veggies and Peanuts: If necessary, add more frying oil to the pan. Fry diced bell peppers, zucchini, and peanuts for 5-6 minutes on medium heat.
- Combine Everything in Pan: Transfer the sautéed chicken to the pan and fry everything together for another 3 minutes.
- Add Sauce: Pour the sauce into the pan and stir. Continue cooking on low heat. After 5-6 minutes, the sauce will become thick. Stir until each piece is covered in sauce and glossy.
- Garnish and Enjoy: Serve Kung Pao chicken over fluffy white rice and garnish with green onions and chili flakes.
Notes
Chicken: Make sure to use skinless, boneless chicken breast and cut it into evenly-sized cubes.
Oil: I used sunflower oil, but you can also use any other type of neutral vegetable oil.
Veggies: I used a mix of zucchini and red bell pepper for the veggies, but you can also use any type of veggies you like.
Peanuts: Peanuts add a nice crunchy texture to this kung pao chicken dish. If you are allergic to peanuts, you can use cashews instead.
Chili Flakes: Chili flakes add the spiciness to kung pao chicken, but you can increase or decrease the amount of chili flakes used according to how much heat you can take.
Soy Sauce: I used gluten-free soy sauce (also known as tamari) to keep this recipe gluten-free. However, if you are not Celiac or gluten-intolerant, go ahead and use regular soy sauce instead. If you are allergic to soy or would simply prefer to keep this soy-free, you can use coconut aminos instead.
Brown Sugar: I used brown sugar, but you can also use white sugar or cane sugar if you prefer. Alternatively, if you are diabetic or insulin-resistant, I recommend using granulated monkfruit sweetener (a 1:1 sugar substitute that is zero glycemic index and will not raise your blood sugar).
Wine: I used white wine, but rice wine will work too.
Oyster Sauce: I used gluten-free oyster sauce to keep the recipe gluten-free, but if you are not Celiac or gluten-intolerant, go ahead and use regular oyster sauce instead.
Sesame Oil: Sesame oil adds a beautiful flavor to this dish, so I highly recommend that you add it in.
Garlic and Ginger: Make sure you use fresh minced garlic and ginger because they add characteristically Asian flavors to this dish.
Cornstarch: Cornstarch helps to thicken the gravy and give it consistency. Alternatively, if you are allergic to corn, you may use tapioca starch or arrowroot starch as a thickener instead.
- Prep Time: 10 mins
- Marinating Time: 30 mins
- Cook Time: 30 mins
- Category: Main Dish
- Method: Stovetop
- Cuisine: Asian