Description
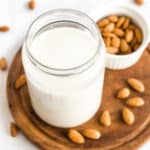
Make your own homemade almond milk in just 5 minutes! This is way cheaper than the store-bought version, has zero preservatives, and tastes much better too! Plus is naturally gluten-free, dairy-free and vegan.
Ingredients
- 1 cup almonds, soaked overnight in filtered water, and strained
- 4 cups filtered water
- 2 tablespoons maple syrup (optional)
- 1 tablespoon vanilla extract (optional)
Instructions
- Rinse and strain the soaked almonds, and then combine them together with 4 cups of filtered water in the bowl of your high-speed blender.
- Blend on high for 1 minute until you get a smooth, creamy and frothy milk. Add the maple syrup and vanilla extract if using, and blend for another 10 seconds until everything is mixed well.
- Pour the milk through a nut milk bag or a fine-mesh strainer to get get rid of the almond pulp. Transfer the milk to sterilized glass jars and store in the refrigerator for up to 4 to 5 days.
Notes
Why Soak the Almonds Overnight? In order to fully activate the enzymes in almonds (or other nuts) and making them easier to digest and creating a more nutritious milk, it’s best to soak them for at least 12 hours or overnight. Soaking also saturates the almonds from inside out, which results in a creamier, silkier mixture and leaves less pulp behind.
Unsweetened Almond Milk: Some savory recipes call for unsweetened non-dairy milk (in the case of this crustless spinach quiche, or a savory bread). To make unsweetened almond milk, simply blend the soaked almonds with the filtered water and strain as per the recipe.
4:1 Magic Ratio: A quick tip for making nut milks is to use a ratio of 4 parts water to 1 part soaked nuts. In case you wish to make a smaller batch of almond milk (to prevent it from turning bad too quickly, especially if you’re the only one drinking it), or wish to make a larger batch of milk, all you need to remember is 4:1 and you can make as much or as little as you wish!
Don’t Skip the Straining: Straining homemade nut milks are essential because of all the pulp that is left behind during the blending process. For the creamiest and silkiest results, I highly recommend using a nut milk bag for straining (especially if you plan on making homemade almond milk frequently). If you don’t own a nut milk bag, the next best alternative would be a fine-mesh strainer.
- Prep Time: 5 mins