
Easy Blackberry Jam (No Pectin)
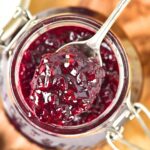
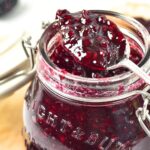
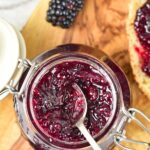
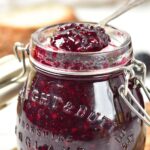
Make this easy blackberry jam without pectin with just 3 simple ingredients and 30 minutes! Thick, rich and flavorful, these homemade blackberry preserves go great on toast, on top of pancakes, or swirled into yogurt. Naturally gluten-free and vegan too.

Want to save this recipe?
Enter your email & I’ll send it to your inbox. Plus, get great new recipes from me every week!
Rich, Flavorful Homemade Blackberry Jam
It’s summer and it’s blackberry season!
If you’ve ever wanted to make your own blackberry jam, I’ll show you how to do it today! This easy blackberry jam comes together with just fresh blackberries, sugar, and lemon juice, no additional pectin required.
Blackberries naturally contain enough pectin to create a beautifully spreadable jam when gently simmered. The result is a rich, intensely fruity preserve that tastes far better than store-bought versions and lets the fresh blackberry flavor shine.
Whether you’re spreading it on toast, swirling it into yogurt, spooning it over homemade pancakes, or adding it to desserts, this simple recipe is an easy way to preserve summer berries.
Why You Don’t Need Pectin
Blackberries naturally contain pectin in their skins and seeds (the underripe berries contain more pectin than super ripe blackberries).
When combined with sugar and lemon juice and cooked long enough, those natural pectins activate and help the jam thicken naturally. The lemon juice also lowers the pH, helping the pectin form the characteristic gel that gives homemade jam its spreadable consistency.
This is why you don’t need to add powdered pectin or liquid pectin to this recipe.


Why You’ll Love this Recipe:
- Just 3 Ingredients: You literally only need 3 simple ingredients to make this delicious blackberry jam (no kidding)!
- Super Easy to Make: Ready in 30 minutes, this homemade blackberry preserves recipe is so simple, anyone can make it (even if it’s your first time making homemade jam)!
- Totally Gluten-Free, Vegan & Pectin-Free: The best part is that this recipe is 100% gluten-free, vegan and no pectin is required! This means that even those with Celiac disease or gluten or lactose intolerances, or those simply on a vegan diet can enjoy it without issues!

Ingredients You’ll Need:
Here’s a visual overview of the ingredients required for making this small batch blackberry jam recipe.
(For exact measurements, please scroll down to the printable recipe card at the bottom of this post.)

Recipe Notes + Substitutions:
- Blackberries: I like using fresh blackberries when they’re in season. However, if you only have frozen blackberries, those will work too. Just bear in mind that frozen blackberries tend to have more moisture, so you will need to cook the jam for an extra 5 to 10 minutes before it’s ready. Slightly underripe blackberries contain more pectin, and can help the jam to set more easily.
- Sugar: In this case, sugar is necessary to bind with the natural pectin from the blackberries to help the jam set properly. I do not recommend reducing the amount of sugar by more than 25% as that will result in a more watery jam. Sugar also acts as a natural preservative by binding some of the water available in the jam, making it more difficult of mould, yeast or bacteria to grow.
- Lemon Juice: Apart from adding tartness, lemon juice is essential in lowering the pH of the fruit mixture, which helps to activate the natural pectin in the blackberries. This enables the pectin to bond with the sugar to get the jam to set properly and have the desired thick, jammy consistency.
How to Make Homemade Blackberry Jam Without Pectin:

Combine Ingredients in Pot: Place the blackberries in a heavy-bottomed pot or medium saucepan. Add the sugar and lemon juice and stir to combine. If the berries are very dry, add a few tablespoons of water to help them release their juices.

Cook Berries & Mash: Heat over medium heat, stirring frequently, mashing the berries gently with the back of a wooden spoon as they soften.

Skim Foam Layer: As the ingredients cook, a layer of pink foam will form on the surface. Skim it off with a spoon as you go for a cleaner, clearer jam. For a smoother consistency, use a potato masher to break down the berries further once they have softened.

Reduce Heat & Simmer: Reduce the heat to low and continue to cook for 10–15 minutes, stirring frequently towards the end to prevent sticking. To test for doneness, use a candy thermometer (the jam is ready when it reaches 221F (104C)). Alternatively, place a small drop of jam on a frozen plate and push it with your finger. If the jam wrinkles and holds its shape, the jam is set.

Let Cool Slightly: Remove from heat and allow to cool slightly. The jam will thicken further as it cools.

Transfer to Jars: Ladle into sterilised jars while still warm and seal immediately with sterilised lids. Store in a cool, dark place for up to 12 months unopened. Once opened, refrigerate and use within 4 weeks.
Dish by Dish Tips:
- Let Simmer Without Rushing: Make sure that you let the jam simmer over low heat without rushing it (don’t give in to the urge to cook it faster by increasing the heat). Boiling the jam too aggressively can burn the sugar before enough moisture evaporates.
- Stir Frequently Towards the End: As the blackberry preserve cooks and thickens, it can stick to the pan, so make sure to stir more frequently towards the end.
- For a More Rustic Appearance: If you like a more rustic look to the jam, don’t mash all the fruit. Instead, leave some of the blackberries intact for more texture.
- For Seedless Blackberry Jam: If you don’t like seeds in your jam, pass the cooked and mashed blackberries (before simmering) through a fine-mesh strainer to separate the fruit from the seeds. Return the seedless mixture to the saucepan and then simmer until you get a thick jammy consistency.
- Add More Fiber: If you wish to make blackberry chia jam, feel free to sprinkle in some 1 to 2 tablespoons of chia seeds once you have cooked and mashed the blackberries. Stir well and then let the mixture sit for 5 to 10 minutes so the chia seeds absorb the moisture.

What to Eat With Blackberry Jam:
Nothing beats eating this homemade blackberry jam slathered on top of a slice of freshly baked homemade bread. Here are some of our favorites:
- Fluffy Gluten-Free White Bread (Dairy-Free)
- Buckwheat Bread (Gluten-Free, Dairy-Free)
- Artisan No-Knead Bread (Gluten-Free, Dairy-Free)
- Honey Oat Bread (Gluten-Free, Dairy-Free)
Other Blackberry Recipes You’ll Love:
Homemade Jams/Marmalades to Make:


P.S. If you try this recipe, I’d love for you to leave a star rating below, and/or a review in the comment section further down the page. I always appreciate your feedback. Be sure to check out my entire Recipe Index for all the recipes on the blog. You can also follow me on Pinterest, Facebook or Instagram! Sign up for my Email List to get fresh recipes in your inbox each week!
Easy Blackberry Jam (No Pectin)
- Total Time: 25 minutes
- Yield: 16 servings 1x
- Diet: Dairy-Free, Gluten-Free, Vegan, Vegetarian
Description
Make this easy blackberry jam without pectin with just 3 simple ingredients and 30 minutes! Thick, rich and flavorful, these homemade blackberry preserves go great on toast, on top of pancakes, or swirled into yogurt. Naturally gluten-free and vegan too.
Ingredients
- 5 cups fresh blackberries
- 1 cup sugar
- 1 tablespoon fresh lemon juice
Instructions
- Combine Ingredients in Pot: Place the blackberries in a heavy-bottomed pot. Add the sugar and lemon juice and stir to combine. If the berries are very dry, add a few tablespoons of water to help them release their juices.
- Cook Berries & Mash: Heat over medium heat, stirring frequently, mashing the berries gently with the back of a wooden spoon as they soften.
- Skim Foam Layer: A layer of pink foam will form on the surface as the berries cook. Skim it off with a spoon as you go for a cleaner, clearer jam. For a smoother consistency, use a potato masher to break down the berries further once they have softened.
- Reduce Heat & Simmer: Reduce the heat to low and continue to cook for 10–15 minutes, stirring frequently to prevent sticking. To test for doneness, use a candy thermometer (the jam is ready when it reaches 221F (104C)). Alternatively, place a small drop on a frozen plate and push it with your finger. If it wrinkles and holds its shape, the jam is set.
- Let Cool: Remove from heat and allow to cool slightly — the jam will thicken further as it cools.
- Transfer to Jars: Ladle into sterilised jars while still warm and seal immediately with sterilised lids. Store in a cool, dark place for up to 12 months unopened. Once opened, refrigerate and use within 4 weeks.
Notes
Blackberries: I like using fresh blackberries when they’re in season. However, if you only have frozen blackberries, those will work too. Just bear in mind that frozen blackberries tend to have more moisture, so you will need to cook the jam for an extra 5 to 10 minutes before it’s ready.
Sugar: In this case, sugar is necessary to bind with the natural pectin from the blackberries to help the jam set properly. I do not recommend reducing the amount of sugar by more than 25% as that will result in a more watery jam. Sugar also acts as a natural preservative by binding some of the water available in the jam, making it more difficult of mould, yeast or bacteria to grow.
Lemon Juice: Apart from adding tartness, lemon juice is essential in lowering the pH of the fruit mixture, which helps to activate the natural pectin in the blackberries. This enables the pectin to bond with the sugar to get the jam to set properly and have the desired thick, jammy consistency.
- Prep Time: 5 mins
- Cook Time: 20 mins
- Category: Jams
- Method: Stovetop
- Cuisine: Western
I can’t find how many jars this makes.
Hi Ginna, it will make roughly 1 16oz jar (or 2 jars 8oz each).