{ PHOTOGPRAHY = TO DRAW WITH LIGHT }
I’ve thought long and hard about whether to post food photography tips.
Firstly, because I’m by no means a professional photographer, and secondly, because there are already so many great resources by other food bloggers out there.
However, I’ve realized that over the past years since I took up food photography, I’ve learnt quite a lot of tricks from all over the place.
I’ve spent hours poring over food photography & food styling books, reading articles online, and most importantly, analyzing photos that I like or don’t like. While I still have a long way to go in bettering my photos, my photos have definitely improved by leaps and bounds over the past few years (compare my photos from May 2012 to those from today, and you can be the judge).
I’ve come to the conclusion that there are certain elements that make up good food photography.
While a lot of how our photos look like depends on our personal style, there are tips and tricks that every photographer can use to help improve their photos.
Here’s my take on what can help you improve your food photos.
I’ve split this post into four segments:
(1) tips & tricks;
(2) recommended products;
(3) other blogging resources; and
(4) additional food photography resources.
While it’s best for you to read all four segments in the order that I’ve written them, each segment always holds up well on its own.
I hope you find these tips, tricks & recommendations useful.
If you have any further questions, feel free to send me an email, and I will try my best to clear your doubts!
{ 1. TIPS & TRICKS }
LIGHTING
Natural light is best. I’ve learnt lighting is extremely important for a photo, as the type of lighting you use creates your signature in food photography.
- Natural light has a quality that is extremely hard to beat.
- I used to shoot at night indoors with yellow kitchen light when I first started food blogging, but realized that it distorted the real colors of the food, creating orange casts or weird green shades that didn’t reflect how delicious the food actually tasted.
- These days, I only shoot in natural light not only because I don’t have space and the budget for artificial lights, but also because I love the look of my photos when shot in natural light
- If your schedule doesn’t allow you to shoot during the day, Lindsay from Pinch of Yum has great tips for shooting with artificial light.
Find the best source of light. Don’t feel obliged to only take pictures of food in your kitchen. Move around until you find the area with the best lighting for your photos.
- I used to only take pictures of food in the kitchen (because naturally that was where I ate and cooked the food). However, my kitchen has limited space and does not have a window, which means no natural light.
- Eventually, I got tired of the yellow tungsten kitchen light and later moved my photography set up to my balcony, which gives me plenty of natural light and best of all, space to move around and arrange my set up.
WHITE BALANCE
Choose the most appropriate white balance setting on your camera before you start to shoot
- Play around with a couple of white balance settings – not just the automatic white balance! – until you find the one that best reflects that natural colors of the food)
- If you want to set a custom white balance, check out this tutorial by Ashley Rodriguez
ANGLE/POSITION
Find the best angle or position for the food you are shooting.
- Vertical angle: Are you shooting a tower of cookies, or a jug of tea? These are moments when the vertical angle is best, to give emphasis to your food with height.
- From-above angle: This angle works best when the food you are shooting is rather flat and has no height. Shooting from above has become a very popular way to shoot these days, but bear in mind that the composition has to be interesting for the shot to stand out.
- 45-degree angle: A 45-degree angle is the most common view that we have of our food (the view we have when seated at the table and are about to tuck into the meal), and is a very common way to make food look ready to be tucked in.
COMPOSITION
Carefully compose your food photos to create visual interest and evoke emotions.
- Rule of thirds: According to Wikipedia, the rule of thirds proposes that an image should be imagined as divided into nine equal parts by two equally spaced horizontal lines and two equally spaced vertical lines, and that important compositional elements should be placed along these lines or their intersections. Proponents of the technique claim that aligning a subject with these points creates more tension, energy and interest in the composition than simply centering the subject.
- Shoot main-subject off center: this creates more interest, similar to the rule of thirds
- Define what you are trying to highlight: E.g., when shooting pizzas, do you want the reader to look at the texture of the pizza crust or the whole pizza in general? Decide what is of more importance.
- What story are you trying to tell? Are you trying to show a rustic farm table setting, or a clean, modern look? What emotions are you trying to invoke in the viewer?
PROPS
Props that are related to the food you’re shooting can make the photo a lot more interesting.
- Relevance: Bear in mind that the props must be relevant to the photo, and that they should only add value without taking the focus off the actual dish.
- E.g. 1. Are you taking photos of pasta? Then maybe a bit of grated cheese and the cheese grater in the background can create the feel that you’ve just served the dish, grated the cheese and are ready to dig in.
- E.g. 2. use parsley in your photo only if you would eat the dish with parsley. Don’t just add props for the sake of doing so.
- Prop ideas: vintage muffin molds, cutlery, kitchen towels, herbs, wooden boards, pretty napkins etc, ingredients.
Where to find props: Everywhere!
- On ETSY, where so many designers have handmade items that you can use as props!
- In your own house! Think kitchen, attic, backyard. You can even use old bed sheets or curtains and cut them up into smaller pieces as use as a backdrop for your photos.
- At garage sales and flea markets. Be creative. Try to imagine things with more than just one purpose. Props don’t have to cost a bomb to be used.
BACKGROUNDS
Use backgrounds to create the mood of your photos
- Rustic setting: distressed wood and burlap can create good, rustic backgrounds
- Modern feel: use a plain white or pastel-colored backgrounds or a pretty marble slab like this one
- Playful mood: use brightly-colored, patterned fabrics and cloths
- Be creative! Don’t limit yourself to what I’ve suggested above. Almost everything can be used as a background if you think hard enough
Where can you find backgrounds?
- On ETSY, where there are so many artesanal artists who create handmade backgrounds
- At garage sales or flea markets: Look out for old farm house tables or a broken door.
- On the street. Sometimes, you can even find beautiful wooden boards to use as backdrops for your photos that other people have discarded (e.g. the top of an old wooden table or a rustic door)
- Make your own wooden boards: if you’re into carpentry and have the tools and space for it
- Hire a carpenter: The wooden boards that I used on my blog have been made-to-measure by my carpenter. Google around for a carpenter that’s in your area if you aren’t savvy with carpentry (as in my case).
CAMERA + LENS
Use a DSLR camera, if your budget allows.
- The most important thing in using a DSLR is being able to change the lens, so I would suggest that you buy an intermediate camera body, but a good lens will make a difference (and also cost more).
- See my recommendations for cameras and lens below in section 2.
Start shooting in manual mode as soon as possible.
- Adjust aperture, shutter speed, and ISO to come up with the photo which best defines your style.
- Aperture: Do you like a shallower depth-of-field (play around with the aperture settings)?
- Shutter speed: Are you trying to capture honey being poured over pancakes (play around with the shutter speed)?
- ISO: Is it too dark, but you don’t want to use artificial light (bump up the ISO number to make your photo more sensitive to light)?
EDITING YOUR PHOTOS
The importance of editing your photos.
- Uploading your photos without first editing them is just like publishing an article without checking it for grammar or punctuation errors. A good photo is made even better with just a couple of easy editing tweaks, and there is a wide range of photo-editing software available for all budgets.
- See my recommendations for photo-editing software below.
Basic photo-editing tools:
- White balance tool (often sufficient with the auto white balance function in your photo-editing software)
- Cropping tool (need to cut out some parts of your photo? This does the trick)
- Rotating tool (It’s normal that some of our photos come out slanted, depending on the angle that we’ve held our cameras. The rotating tool makes for quick and easy remedy for those slanted photos).
- Exposure tool (If your photos are over-exposed or under-exposed, you can easily fix that with the exposure tool)
ANALYZE FOOD PHOTOS
Read blogs with food photography that calls out to you.
- Keep a collection of good food blogs that you can turn to for inspiration (blogs whose food photos jump out at you and evoke emotions)
- Train your eye: The more you look at high quality food photography, the more you increase the benchmark for your own food photography. When you are used to seeing good food photos, you start being more critical and will push yourself to shoot better (whether it is in terms of composition, lighting, etc).
- Blogs with inspirational food photography:
Discern why you like or don’t like certain food photos:
- Photos you don’t like: Ask yourself why you find yourself frowning at a particular photo. Is it because the white balance is off and the foods don’t have colors that reflect what they should look like? Or is it because of the composition? Is the photo too cluttered?
- Photos you like or love: In the same way, analyze the photos that make your eyes linger on them. Is the rustic setting something that appeals to you? Are the props what make your heart stop? Think about these things, so the next time you get ready to shoot, you keep them in mind and incorporate them in your photos.
PRACTICE MAKES PERFECT
Great food photographers were not born shooting great photos.
- Many of the amazing food photographers are where they are today because of hours, weeks, months, and years of practice.
- They are where they are today because they show up every single day, and work at it.
Keep on practicing.
- In my dad’s all-time favorite quote, “practice makes perfect”, and you have to keep on practicing until you see improvement.
- In Bjork’s words – 1% ∞, which means to keep on pushing yourself to improve at least 1% everytime, from now until infinity. This view is focused on the long-term perspective, and helps move forward with our goal in the further future.
{ 2. LOVED & RECOMMENDED }
RECOMMENDED CAMERAS
- If you are shopping around for a camera and have the budget to spare, I strongly urge you to buy a digital single-lens reflex (DSLR) camera.
- Either a Canon DSLR or Nikon DSLR will be good, but I am biased towards Canon.
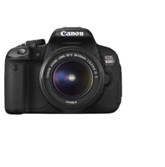
- I recommend that you purchase an intermediate (and not so expensive) camera body such as the Canon EOS 650D which was my first camera and then buy a separate lens. Today I use the Canon EOS 6D which I bought second hand but serves me so so well.
RECOMMENDED LENS
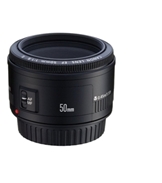
- I highly recommend my trusty Canon 50mm f/1.8 lens for food photography. At just slightly more than US$100, it’s one the the best and most affordable lens for food photography. All the food photos that I take today are shot with this amazing lens.
- If you have a larger budget, I suggest getting the Canon 50 mm f/1.4 lens. This will produce much brighter and sharper images, but will cost you quite a bit more.
RECOMMENDED PHOTO-EDITING SOFTWARE

- GIMP (free to download here). I used to use GIMP when I first started out because it’s free and sufficient for basic photo-editing needs. If you don’t have much of a budget to spend on premium photo-editing software, then I suggest first using GIMP.
- Adobe Lightroom (used and recommended by many top food bloggers). I’ve now only use Lightroom for editing and the effects that can be created with it for food photography is just amazing.
RECOMMENDED FOOD PHOTOGRAPHY BOOKS
- Tasty Food Photography eBook by Lindsay of Pinch of Yum. At only $19, this ebook literally pays for itself. It was the first food photography book that I’d ever bought, and Lindsay’s step-by-step photos gives beginngers a good grasp of what being a food blogger requires. Lindsay’s book really helped me improve my food photos particularly in the first two years of blogging.
![]()
- Plate to Pixel: Digital Food Photography & Styling by Helene Dujardin of Tartelette. This is hands down my favorite book on food photography (I’ve read it FIVE times). Helene’s food photos are absolutely stunning. Flipping through the book gives you great ideas for food styling and photography. HIGHLY RECOMMENDED.
{ 3. OTHER BLOGGING RESOURCES }
{ 4. ADDITIONAL FOOD PHOTOGRAPHY RESOURCES }
- Food Photography School (130+ Food Photography Videos) by Minimalist Baker
- 12 Things that Have Helped my Food Photography by The Bonjon Gourmet
- Principles of Photography series by White on Rice Couple
- Language of Photography series by Gourmande in the Kitchen
- Food Photography and Styling by 6 Bittersweets
- 15 Essential Food Photography Tips from Andrew Scrivani
- Food Photography Creative Process from V.K.Rees
- Photographing Food with Penny De Los Santos by National Geographic
- Food Photography Tips by Bella Eats
- Smitten Kitchen’s Approach to Food Photos by Smitten Kitchen
- Food Photography Tips by Heidi Swanson
- Food photography tips from Food & Wine
- Food Photography Tips for Food Bloggers by Cookie + Kate
- Food photography tips for instagram and smartphones by Aran Goyoaga
{ DISCLAIMER }
Please note that some links on this page are affiliate links, which means that I receive a small percentage of the product’s price (which remains the same for you).
I only link to products that I trust and recommend. Thank you for your support!
I am not a professional photographer. But I would like to capture food photography. I have a little bit of weakness in food photography. Whatever food photography tips are most helpful for me.
Hi Elina! Thanks for your note 🙂
My most important tip for improving food photography, is to shoot as many different types of food as possible (if you can at least once or twice a week) – whether it’s fresh fruits, produce, or baked goods, or anything you cook. If you do this practice on a consistent basis, you’ll get better and better over time (it may take more or less time depending on how much you practice), but you will definitely improve.
Also, make sure you shoot in manual mode as soon as possible. Play around with the settings until you learn how to control your camera.
Lastly, look at food photos (blogs/magazines/books) that you like, collect them on a Pinterest board or print and paste them in a notebook and note down what you like about them (light, composition, color styles etc), and then try to emulate the style in the photos you shoot.
Hope this helps, and all the best in your food photography journey! It’s going to be sooooo fun!
A pleasant post, I love the way you broke the lighting setup all down into suitable steps. What do you think about automatic white balance? Which means, do you need to be told there is a white balance setting in your camera?
Hi Felicia,
Wow, so many great tips and resources! I’m new to food blogging and a little overwhelmed by all I have yet to learn, but this post is really helpful!
Thanks so much,
Ashley
Hi Ashley! So nice to meet you! And I’m so happy that this post helped you 🙂 Food blogging is a wonderful world with so many lovely bloggers, so I’m glad you’re now a part of it! 🙂
hola! me encanta la fotografia de alimentos pero no sabia por donde empezar… soy pastelera y me gustaria saber fotografiar lo que hago… gracias por la info !! muy interesante para una principiante como yo!! 🙂
Hola Ornella! Como estas? Encantada, y gracias por tus lindas palabras! Ojala que la info te sirva!! Tengo tanto mas para aprender de la fotografía de comida.. y estoy siempre buscando trucos nuevos para que la comida se luzca tan bien como se sabe!! Te mando un beso!
Hi Felicia,
I wonder how I could have missed out this wonderful post earlier.
This post is so good with great information on food photography tips and tricks unknown to an ordinary person like me. It really gives me a new and interesting perspective in appreciating pictures and photographs.
Thank you – I love your sharing 🙂
With lots of love,
Mum
Mummy…I love food photography!!! Glad this post helps unravel the tricks/tips behind a good food photo! 🙂
Wow – all this information in one post!!! Thank you for all the tips, for your beautiful, delicious blog.
Greetings
Hi Beata! I’m so happy that you’ve found this post useful – I wanted to make it something that could give readers an overall but also detailed food photography tips. Thank you so much for stopping by and for your lovely comment! Would love to see you around again!
🙂
Great reference. Thank you for the tips!
You’re most welcome Julie! So glad you found the tips useful! <3
Really great advice Felicia!
I have noted some links are not working. The ones to not without salt, sprouted kitchen and my name is yeh.
Hey Kathrin! Thanks for letting me know! Gonna correct the broken links right now! 🙂 And glad you enjoyed the tips!
wonderful tips!
Thank you Dorothy! I’m so happy you enjoyed the tips and found them useful!
Wonderful resource. Thx for putting this together. I am sure many food bloggers will really appreciate all your efforts.
Peter! Thnaks for your encouraging comment! I hope that other food bloggers will find this resource useful! It’s all about sharing what we learn! 🙂 Have a wonderful weekend!
Thanks for the great info. I have been thinking about a new lens lately but had no idea where to begin. Thanks for the recommendation.
Hey Christine!! Thanks for reading! I highly recommend the prime lens Canon 50mm f/1.8 for food photography or its Nikon counterpart – depending on your camera. This lens is called the “nifty-fifty” because it’s the best bang for its buck!. I use it 100% of the time for food photos, and for portraits of people!
I read a couple of lens reviews the other day (comparing the 50mm f/1.8, 50mm f/1.4 and 50mm f/1.2) – it said that unless you are willing to spend $1500+ on the f/1.2 (which is technically the BEST of the three), the f/1.8 should be good for most other uses. There isn’t much of a diff between f/1.8 and f/1.4 (except for the fact that f/1.4 costs almost 3 times as much as the f/1.8).
Hope this helps you with your decision on which lens to get!!
I’m loving all this information in one post! Thank you!
Mary! Thanks so much for dropping by!! So glad you found it informative 🙂 Hope these tips and tricks help you as much as they have helped me! I will update this post as time goes by and as I learn more – so as many people can benefit from it as possible!
Thank you for all the tips, great post!
You are most welcome Tara!! Thanks so much for stopping by!
Terrific post! Thanks so much for taking the time putting all this relevant information in one place.
You’re most welcome Susie! Thanks for takign the time to read it! Glad it was useful to you!