Description
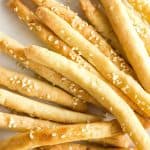
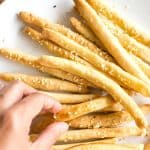
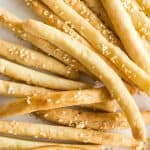
Incredibly crunchy and highly snackable, these easy homemade gluten-free breadsticks are the perfect in-between meal snack or appetizer. Dip these gluten-free grissini in olive oil, hummus or red pepper dip, or enjoy them alone. Totally dairy-free, and vegan too, but no one would guess!
Ingredients
- 2 3/4 cups gluten-free all-purpose flour
- 1 teaspoon xanthan gum (omit if your gluten-free flour blend already includes it)
- 1 teaspoon instant dry yeast
- 1 teaspoon sugar
- 3/4 cup + 1 tablespoon warm water (approx. 105 to 110F)
- 1/3 cup extra virgin olive oil + more for brushing
- 1 1/4 teaspoon fine salt
- 1/4 cup white sesame seeds, for sprinkling (optional)
Instructions
- Prepare Dough: Combine gluten-free all-purpose flour, xanthan gum (if using), salt, yeast, sugar, warm water, and oil together in a large mixing bowl. Mix well until you get a homogeneous dough. Cover with plastic wrap and let it sit for an hour.
- Preheat and Line: Preheat oven to 375F and line a large baking sheet with a silpat or parchment paper. Arrange the oven rack to the middle position.
- Cut Out Dough: Divide the dough into 4 pieces and then roll each piece out on parchment paper or a silpat into a 1-inch thick rectangle approximately 7 inches wide and 10 inches long. Use a knife to cut out 1-inch wide logs (you should get 7 logs for each piece of dough, so 28 pieces in total).
- Shape the Logs: Use your fingers to gently shape each piece of dough into typical breadstick logs.
- Transfer Logs to Baking Sheet: Place the logs on the prepared baking sheet in a single layer at least 1 inch apart (they will expand very slightly during baking).
- Brush with Oil: Brush the dough logs generously with olive oil.
- Sprinkle with Seeds: Sprinkle sesame seeds over the dough logs.
- Bake: Bake for 30 to 35 minutes until breadsticks are golden brown and crunchy.
- Cool Completely: Let breadsticks cool completely before serving or storing.
Notes
Gluten-Free All-Purpose Flour: I recommend using a good quality gluten-free flour blend that is made up of a mix of lighter flours and starches (such as rice flour, tapioca starch, corn starch or potato starch) to ensure you get an airier and lighter final texture. I do NOT recommend flour blends that are made up of heavier flours such as garbanzo bean flour as that will result in a very dense texture.
Xanthan Gum: Xanthan gum is the substitute for gluten in gluten-free flours, and helps the ingredients to better bind together. If your gluten-free flour blend does not already include it, make sure to add it in.
Instant Yeast: I like using instant dry yeast because no prior activation time is required and I can mix it in with the other ingredients at the same time. Alternatively, you may use active dry yeast, but make sure to activate the yeast with warm water and sugar before adding the other ingredients.
Sugar: The sugar acts as food for the yeast to feed on, and is essential in order for the yeast to be activated and produce the gases that cause the dough to rise. I used granulated white sugar, but feel free to use cane sugar, light brown sugar, maple sugar, or coconut sugar if you prefer.
Warm Water: Make sure that the water is between 105 to 110F as the yeast requires warmth to be activated, but if the water is too hot, it may kill the yeast. You can also use a non-dairy milk (such as almond milk, cashew milk, rice milk, coconut milk or oat milk). Alternatively, if you are not lactose-intolerant, go ahead and use normal milk instead.
Olive Oil: I like using extra virgin olive oil for the taste it imparts to the breadsticks, but feel free to use other oils such as avocado oil or normal vegetable oil if you prefer. If you are not lactose-intolerant, go ahead of use melted butter if you wish.
Sesame Seeds: I like topping the breadstick dough with white sesame seeds for extra taste and color. Feel free to mix in black sesame seeds too. Alternatively, you may omit the sesame seeds completely if you don’t enjoy them.
Silpat/Parchment Paper: Make sure you line the baking sheet with parchment paper or a silpat to ensure that the dough does not stick to the baking sheet.
Storing: Allow the homemade breadsticks to fully cool before placing them in an airtight container and storing at room temperature. They will remain crispy for up to 5 days.
Freezing the Dough: You can prepare the dough before hand. Simply wrap it in plastic wrap after it has rested for an hour (step 1) and freeze for up to 3 months. Allow the dough to thaw completely overnight in the refrigerator before rolling it into pieces and cutting it into logs and baking.
This recipe was originally published in March 2021, but has since been republished to include clearer step-by-step instructions and ingredient notes and substitutions.
Adapted from: Pretty. Simple. Sweet.
- Prep Time: 1 hour 30 mins
- Cook Time: 35 mins
- Category: Snacks
- Method: Baking
- Cuisine: Italian