Easy Gluten-Free Breadsticks (Dairy-Free, Vegan)
Incredibly crunchy and highly snackable, these easy homemade gluten-free breadsticks (grissini breadsticks) are the perfect in-between meal snack or appetizer. Dip them in olive oil, hummus or red pepper dip, or enjoy them alone. Totally dairy-free, and vegan too, but no one would guess!
")
Want to save this recipe?
Enter your email & I’ll send it to your inbox. Plus, get great new recipes from me every week!
Jump to:
- Crunchy Grissini Breadsticks for the Perfect Appetizer or Snack
- The Quest for Gluten-Free Breadsticks:
- Why This Recipe Works
- Ingredients You’ll Need:
- Ingredient Notes/Substitutions:
- How to Make Gluten-Free Breadsticks (Step by Step):
- Dish by Dish Tips/Tricks:
- Recipe FAQs:
- What to Eat with These Gluten-Free Breadsticks
- Gluten Free Bread Recipes to Bake:
- Other Snacks/Appetizers You’ll Enjoy:
- Easy Gluten-Free Breadsticks (Dairy-Free, Vegan)
Crunchy Grissini Breadsticks for the Perfect Appetizer or Snack
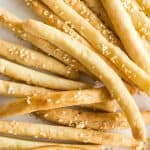
Originating from Italy, breadsticks are also known as grissini (or grissino), and are basically pencil-sized sticks of bread that are great for dipping.
I remember that when Juan and I were in holidaying in Italy, practically every restaurant we went to served some variation of grissini as an appetizer to calm our hungry stomachs as we impatiently waited for our food to be served.
I later noticed that in most Italian restaurants all over the world, breadsticks almost always features prominently in the bread basket served at each table.
Since then, I’ve been a fan of breadsticks, especially when they’re crunchy, crispy, and insanely irresistible (not to mention when you’re famished and likely to devour any and everything that’s placed in front of you).
")
The Quest for Gluten-Free Breadsticks:
I wanted to recreate a gluten-free version of breadsticks that were also dairy-free that Juan my husband who is Celiac and also lactose-intolerant could enjoy at home, and so I adapted this recipe to create our own gluten-free grissini!
It turns out that making homemade breadsticks requires a bit of time (from letting the yeast work and rolling the breadsticks out), but apart from that, they’re really simple to make!
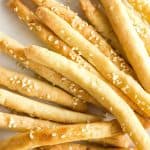
Unlike the soft breadsticks you may find at Olive Garden, these breadsticks are crunchy, crispy, and absolutely love the sound they make when you snap them into two!
Why This Recipe Works
- Simple Ingredients: The ingredients for this vegan gluten-free breadsticks recipe are easily accessible at the local grocery store, and you might already have them in your kitchen (nothing fancy required)!
- Easy to Make: The dough comes together very quickly, and shaping the dough into thin logs is not complicated at all, so don’t worry even if this is your first time making homemade breadsticks!
- Flavorful: Thanks to the olive oil used in the dough, these Italian breadsticks are not bland at all. Instead, they have a beautiful flavor and are topped with sesame seeds for extra taste and texture.
- Crunchy and Crispy for Days: The breadsticks remain crunchy and crispy even days after baking – which is a huge bonus in my book!
- Totally Gluten-Free, Dairy-Free & Vegan: The best part is that these delicious grissini breadsticks are made with gluten-free flour instead of normal wheat flour, and olive oil instead of butter. This means that they are 100% gluten-free, dairy-free and vegan, so even those with Celiac disease or gluten and lactose intolerances can enjoy them without worries!
")
Ingredients You’ll Need:
Here’s a visual overview of the ingredients required to make these crunchy homemade gluten-free breadsticks recipe.
(For exact measurements, please scroll down to the printable recipe card at the bottom of the post.)
")
Ingredient Notes/Substitutions:
- Gluten-Free All-Purpose Flour: I recommend using a good quality gluten-free flour blend that is made up of a mix of lighter flours and starches (such as rice flour, tapioca starch, corn starch or potato starch) to ensure you get an airier and lighter final texture. I do NOT recommend flour blends that are made up of heavier flours such as garbanzo bean flour as that will result in a very dense texture.
- Xanthan Gum: Xanthan gum is the substitute for gluten in gluten-free flours, and helps the ingredients to better bind together. If your gluten-free flour blend does not already include it, make sure to add it in.
- Instant Yeast: I like using instant dry yeast because no prior activation time is required and I can mix it in with the other ingredients at the same time. Alternatively, you may use active dry yeast, but make sure to activate the yeast with warm water and sugar before adding the yeast mixture to the other ingredients.
- Sugar: The sugar acts as food for the yeast to feed on, and is essential in order for the yeast to be activated and produce the gases that cause the dough to rise. I used granulated white sugar, but feel free to use cane sugar, light brown sugar, maple sugar, or coconut sugar if you prefer.
- Warm Water: Make sure that the water is between 105 to 110F as the yeast requires warmth to be activated, but if the water is too hot, it may kill the yeast. You can also use a non-dairy milk (such as almond milk, cashew milk, rice milk, coconut milk or oat milk). Alternatively, if you are not lactose-intolerant, go ahead and use normal milk instead.
- Olive Oil: I like using extra virgin olive oil for the taste it imparts to the breadsticks, but feel free to use other oils such as avocado oil or normal vegetable oil if you prefer. If you are not lactose-intolerant, go ahead of use melted butter if you wish.
- Sesame Seeds: I like topping the breadstick dough with white sesame seeds for extra taste and color. Feel free to mix in black sesame seeds too. Alternatively, you may omit the sesame seeds completely if you don’t enjoy them.
How to Make Gluten-Free Breadsticks (Step by Step):
1. Prepare the Breadstick Dough
Whisk the dry ingredients together before combining them with the wet ingredients: the gluten-free all-purpose flour, xanthan gum (if using), salt, yeast, sugar, warm water, and oil together in a large mixing bowl. Stir well until you get a homogeneous dough.
Cover the dough with plastic wrap and let it sit for an hour in a warm location for the dough to rise (very important!). The dough will only rise very slightly, but this step is still important.
")
2. Preheat and Line
Preheat oven to 375F and line a large baking sheet or cookie sheet with a silpat or parchment paper. Arrange the oven rack to the middle position.
3. Cut Dough into Pieces
Divide the dough into 4 pieces and then roll each piece out on parchment paper or a silpat into 1-inch thick rectangle approximately 7 inches wide and 10 inches long.
Use a knife to cut out 1-inch wide logs (you should get 7 logs for each piece of dough, so 28 pieces in total).
")
4. Shape the Logs
Use your fingers to gently shape each piece of dough into typical breadstick logs.
")
5. Transfer Logs to Baking Sheet
Place the logs on the siplat-lined or parchment-lined baking sheet in a single layer at least 1 inch apart (they will expand very slightly during baking).
")
6. Brush with Oil
Use a pastry brush to brush the dough logs generously with olive oil.
")
7. Sprinkle with Seeds
Sprinkle sesame seeds over the dough logs.
")
8. Bake Until Golden
Bake for 30 to 35 minutes until the homemade gluten-free breadsticks are golden brown and crunchy.
")
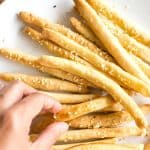
9. Cool Completely
Let the gluten-free bread sticks cool completely before serving or storing.
")
Dish by Dish Tips/Tricks:
- Line with Silpat/Parchment Paper: Make sure you line the baking sheet with parchment paper or a silpat to ensure that the dough does not stick to the baking sheet.
- Flavoring Options: This is a basic gluten free breadsticks recipe, and if you would like to add more flavor, feel free to mix in 1/4 teaspoon of Italian seasoning, paprika powder or garlic powder (for gluten free garlic breadsticks) into the dough before rolling it out into logs. You may also sprinkle to dough with garlic salt after brushing them with olive oil before baking them.
Recipe FAQs:
Allow the baked gluten-free bread sticks to fully cool before placing them in an airtight container and storing at room temperature. These grissini breadsticks will remain crispy for up to 5 days.
You can prepare the dough before hand. Simply wrap it in plastic wrap after it has rested for an hour (step 1) and freeze for up to 3 months. Allow the dough to thaw completely overnight in the refrigerator before rolling it into pieces and cutting into logs and baking.

What to Eat with These Gluten-Free Breadsticks
Here are a few things you can eat with these delicious grissini breadsticks:
- Easy Creamy Hummus (Gluten-Free, Vegan)
- Easy Baba Ganoush (Gluten-Free, Vegan)
- Roasted Red Pepper Dip (Gluten-Free, Vegan)
- Spinach Dip (Gluten-Free, Vegan)
- Buffalo Chicken Dip (Gluten-Free, Dairy-Free)
- Sausage Rotel Dip (Gluten-Free, Dairy-Free)
- Marinara Sauce
Gluten Free Bread Recipes to Bake:
- Soft Dinner Rolls (Gluten-Free, Dairy-Free)
- Easy Homemade Croutons (Gluten-Free, Vegan)
- Flavorful Naan Bread (Gluten-Free, Dairy-Free)
- Homemade Baguette (Gluten-Free, Dairy-Free)
- Fluffy, Tender Bagels (Gluten-Free, Dairy-Free)
Other Snacks/Appetizers You’ll Enjoy:


P.S. If you try this recipe, I’d love for you to leave a star rating below, and/or a review in the comment section further down the page. I always appreciate your feedback. Be sure to check out my entire Recipe Index for all the recipes on the blog. You can also follow me on Pinterest, Facebook or Instagram! Sign up for my Email List to get fresh recipes in your inbox each week!
Easy Gluten-Free Breadsticks (Dairy-Free, Vegan)
- Total Time: 2 hours 5 minutes
- Yield: 28 breadsticks 1x
- Diet: Gluten Free
Description
Incredibly crunchy and highly snackable, these easy homemade gluten-free breadsticks are the perfect in-between meal snack or appetizer. Dip these gluten-free grissini in olive oil, hummus or red pepper dip, or enjoy them alone. Totally dairy-free, and vegan too, but no one would guess!
Ingredients
- 2 3/4 cups gluten-free all-purpose flour
- 1 teaspoon xanthan gum (omit if your gluten-free flour blend already includes it)
- 1 teaspoon instant dry yeast
- 1 teaspoon sugar
- 3/4 cup + 1 tablespoon warm water (approx. 105 to 110F)
- 1/3 cup extra virgin olive oil + more for brushing
- 1 1/4 teaspoon fine salt
- 1/4 cup white sesame seeds, for sprinkling (optional)
Instructions
- Prepare Dough: Combine gluten-free all-purpose flour, xanthan gum (if using), salt, yeast, sugar, warm water, and oil together in a large mixing bowl. Mix well until you get a homogeneous dough. Cover with plastic wrap and let it sit for an hour.
- Preheat and Line: Preheat oven to 375F and line a large baking sheet with a silpat or parchment paper. Arrange the oven rack to the middle position.
- Cut Out Dough: Divide the dough into 4 pieces and then roll each piece out on parchment paper or a silpat into a 1-inch thick rectangle approximately 7 inches wide and 10 inches long. Use a knife to cut out 1-inch wide logs (you should get 7 logs for each piece of dough, so 28 pieces in total).
- Shape the Logs: Use your fingers to gently shape each piece of dough into typical breadstick logs.
- Transfer Logs to Baking Sheet: Place the logs on the prepared baking sheet in a single layer at least 1 inch apart (they will expand very slightly during baking).
- Brush with Oil: Brush the dough logs generously with olive oil.
- Sprinkle with Seeds: Sprinkle sesame seeds over the dough logs.
- Bake: Bake for 30 to 35 minutes until breadsticks are golden brown and crunchy.
- Cool Completely: Let breadsticks cool completely before serving or storing.
Notes
Gluten-Free All-Purpose Flour: I recommend using a good quality gluten-free flour blend that is made up of a mix of lighter flours and starches (such as rice flour, tapioca starch, corn starch or potato starch) to ensure you get an airier and lighter final texture. I do NOT recommend flour blends that are made up of heavier flours such as garbanzo bean flour as that will result in a very dense texture.
Xanthan Gum: Xanthan gum is the substitute for gluten in gluten-free flours, and helps the ingredients to better bind together. If your gluten-free flour blend does not already include it, make sure to add it in.
Instant Yeast: I like using instant dry yeast because no prior activation time is required and I can mix it in with the other ingredients at the same time. Alternatively, you may use active dry yeast, but make sure to activate the yeast with warm water and sugar before adding the other ingredients.
Sugar: The sugar acts as food for the yeast to feed on, and is essential in order for the yeast to be activated and produce the gases that cause the dough to rise. I used granulated white sugar, but feel free to use cane sugar, light brown sugar, maple sugar, or coconut sugar if you prefer.
Warm Water: Make sure that the water is between 105 to 110F as the yeast requires warmth to be activated, but if the water is too hot, it may kill the yeast. You can also use a non-dairy milk (such as almond milk, cashew milk, rice milk, coconut milk or oat milk). Alternatively, if you are not lactose-intolerant, go ahead and use normal milk instead.
Olive Oil: I like using extra virgin olive oil for the taste it imparts to the breadsticks, but feel free to use other oils such as avocado oil or normal vegetable oil if you prefer. If you are not lactose-intolerant, go ahead of use melted butter if you wish.
Sesame Seeds: I like topping the breadstick dough with white sesame seeds for extra taste and color. Feel free to mix in black sesame seeds too. Alternatively, you may omit the sesame seeds completely if you don’t enjoy them.
Silpat/Parchment Paper: Make sure you line the baking sheet with parchment paper or a silpat to ensure that the dough does not stick to the baking sheet.
Storing: Allow the homemade breadsticks to fully cool before placing them in an airtight container and storing at room temperature. They will remain crispy for up to 5 days.
Freezing the Dough: You can prepare the dough before hand. Simply wrap it in plastic wrap after it has rested for an hour (step 1) and freeze for up to 3 months. Allow the dough to thaw completely overnight in the refrigerator before rolling it into pieces and cutting it into logs and baking.
This recipe was originally published in March 2021, but has since been republished to include clearer step-by-step instructions and ingredient notes and substitutions.
Adapted from: Pretty. Simple. Sweet.
- Prep Time: 1 hour 30 mins
- Cook Time: 35 mins
- Category: Snacks
- Method: Baking
- Cuisine: Italian

I’ve made these twice now. First time I thought I’d messed up and gave them a second try tonight. Both times the dough is super crumbly and doesn’t come together well. It doesn’t rise at all. Because they are crumbly they are hard to form and they don’t all survive baking without breaking. The final result is a breadstick that is super hard. They taste good if you can eat them without breaking a tooth.
I have no idea what is going wrong. I’ve followed the instructions to a T. I used Bob’s Red Mill GF flour and instant yeast that is new.
Hi Jordana, sorry to hear that your breadsticks didn’t turn out good – you definitely shouldn’t have to break a tooth to eat breadsticks!
May I know if you used Bob’s Red Mill 1:1 baking flour, or the all-purpose gluten-free flour? Their all-purpose flour contains garbanzo bean flour (which I don’t recommend). I recommend using a gf flour blend that has lighter flours/starches (such as rice flour, tapioca starch, corn starch or potato starch), such as King Arthur Flour Gluten-Free all-purpose flour.
Can you used baking powder instead of yeast?
Hi Karen, unfortunately baking powder will not work. You’ll need yeast for these breadsticks. Hope this helps!
Hi ,
I tried this recipe . Breadsticks are really tasty . But they are very hard , can u suggest something to lighten the texture . I used rice flour, potato starch , tapioca and xanthum gum .
Thanks
Hi Swati, did you use instant yeast as stated in the recipe? The yeast is what helps to create small air pockets so that the breadsticks turn out crunchy, not hard. As for the flours, what porportion of each flour/starch did you use?
I used dry yeast and activated for 10 minutes by adding 1 teaspoon of coconut sugar and lukewarm water . I used virgin coconut oil as i didnt have olive one .
I used schar gluten free flour . I kept the dough covered for 1 hour .
Please do guide what went wrong .
Hi Swati, sometimes depending on the temperature and humidity of your kitchen (which will depend on where you live, the season you’re currently in etc), the rising period may take longer. Did you check that your yeast works and is not expired? (Did it foam after activation)? If the yeast works, it means you need to let the dough rise longer, because it probably needs more time for the air bubbles to form.
Hope this helps!
Felicia, do you remember how I enjoyed the bread served in the bread basket before a meal in the Italian restuarants we used to go?
These breadsticks are usually part of the bread found in these bread basket and I usually asked for a second helping of the breadsticks.
Now I can bake my own breadsticks and have as much as I like to enjoy with my favourite dip.
Thanks Felicia for reposting this – it reminds me of the little things I enjoy in life that make me happy 🙂
Love you lots,
Mum
Hi mummy, I know how much you love the bread basket before every meal! 😉 Next time make these crunchy breadsticks I’m sure you and daddy will enjoy them!
Thank you Felicia for enhancing and modifying this simple recipe of yours from years ago.
If I do not have any gluten-free flour on hand, can I just use normal all purpose flour and mix with some rice flour for a dryer and lighter texture? Do you think this will work well for this breadstick recipe? Appreciate your thoughts on this before I try it out.
Thanks in advance !
Have a blessed day ahead,
Mum
Hi mummy! Yes I believe you can use normal all-purpose flour and mix a bit of rice flour in too. Show me how the breadsticks turn out if you make them in the end! Love you
Hello Felicia
Your recipe looks delicious! Can you explain please what is meant by
* 2 3/4 cups gluten-free all-purpose flour
I’m uncertain if I should use
2 lots of 3/4 cups of gluten free flour e.g. 3/4 +3/4
or
2 cups plus 3/4 cup?
Hi Beth!
Thanks for writing! I mean 2 cups + 3/4 cup of GF flour.
Hope you enjoy these breadsticks, and see you around the blog again sometime soon!
xx,
Felicia
Great,Felicia, I’ll copy your recipe!
Ciao Anna!
I hope you like it! It was a recipe passed to me from my cooking prof!
Baci!
Baci!
I was thinking to make the same…breadsticks. Are we on the same wave length or what? Hahaha
Hello Irene!
Maybe we are! I was inspired by the pies you made and wanted to make my own dough too! this was a recipe passed to me by my cooking professor! 🙂
Hi Ellis, sorry i missed out the water in the steps. It should come after you add in the oil, and u should add the water in bit by bit, untile it reaches the right consistency (i.e. DO NOT pour in the water all at once). 🙂
when do you add the water in? There is no water involve in your steps?