
Soft, Fluffy Brown Rice Bread (Gluten-Free, Dairy-Free)
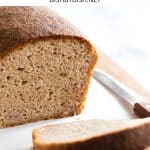
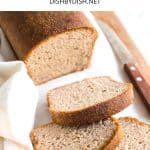
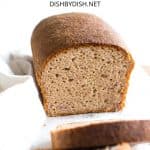
This soft and fluffy brown rice bread is simple to make, and is great for making sandwiches, or toasting and spreading with butter and jam. Made with brown rice flour for extra fiber, this easy yeast bread is totally gluten-free and dairy-free too.

Want to save this recipe?
Enter your email & I’ll send it to your inbox. Plus, get great new recipes from me every week!
Jump to:
- My Love for Homemade Bread
- Super Easy Brown Rice Bread
- Why This Recipe Works
- Make Your Own Brown Rice Flour
- Ingredients You’ll Need:
- Ingredient Notes/Substitutes:
- How to Make Brown Rice Bread (Step by Step)
- Dish by Dish Tips and Tricks
- Recipe FAQs:
- Other Bread Recipes You’ll Love:
- Soft, Fluffy Brown Rice Bread (Gluten-Free, Dairy-Free)
My Love for Homemade Bread
Of all the baked goods out there, homemade bread is definitely my favorite to bake.
While quick breads such as this wildly popular easy honey oat bread or this low-carb coconut flour bread are simpler to throw together and bake, baking yeast breads has become almost therapeutic for me, and watching the yeast work its magic to make the dough double in size has never ceased to amaze me.
I’ve baked plenty of yeast breads over the years. In particular, my husband Juan and I love enjoying toast with jam in the mornings, so I literally make a loaf of bread every week.
Sometimes it’s this foolproof soft, fluffy gluten-free bread, other times it’s a more fiber-rich buckwheat bread, and most recently, it’s been this easy brown rice bread.

Super Easy Brown Rice Bread
When I say this loaf of gluten-free bread is super easy to make, I’m really not kidding. It’s all a matter of mixing wet ingredient with dry ingredients and then letting the dough rise before baking.
This recipe is also completely gluten-free and dairy-free, which means that even those who are Celiac or have gluten or lactose intolerances can enjoy a large slice of homemade bread!

Why This Recipe Works
Unlike breads with gluten, in this gluten-free yeast bread recipe there’s no kneading involved, no double rise required, and trust me when I say that this bread always comes out great. Plus, it has a beautiful dome shape that I absolutely love!
Even if you don’t have access to affordable gluten-free flour blends, you can still make this recipe, because no flour blend is required! The only flour you’ll need in this recipe is brown rice flour.

Make Your Own Brown Rice Flour
One of the key ingredients in this recipe is brown rice flour, and it’s really simple to make your own in just minutes! All you need is brown rice, a high-speed blender, and a fine-mesh sieve.
Check out my easy tutorial on how to make brown rice flour and learn to make your own homemade rice flour today!

Ingredients You’ll Need:
This is a visual overview of the ingredients you’ll need. For the specific quantities and measurements, please refer to the recipe card at the bottom of this post.

Ingredient Notes/Substitutes:
- Brown Rice Flour: I like making my own 5-minute homemade brown rice flour, but you can easily buy it online instead. Since this recipe is specifically to make brown rice bread, I wouldn’t recommend swapping it with white rice flour, as the textures are different (white rice flour is starchier than brown rice flour). If you would like to make this with other gluten-free flours with a texture similar to brown rice flour, you can use millet flour or sorghum flour in equal quantities.
- Sunflower Oil: I used sunflower oil because that’s what I always have on hand. Alternatively, you can use any neutral vegetable oil.
- Psyllium Husk Powder: Psyllium husk powder is essential in the recipe for binding the ingredients and creating the beautiful dome-shape loaf, and I do NOT recommend substituting it with any other ingredient. If you have psyllium husks, you can grind very finely to get a fine psyllium husk powder.
- Sugar: Sugar is required as food for the yeast to feed on so the yeast will be activated and make the bread rise. Do not leave it out.
- Instant Yeast: I like using instant yeast because it doesn’t need to be activated beforehand.
- Xanthan Gum: Since this is a gluten-free recipe, xanthan gum is required as a replacement for gluten to help bind the ingredients together.
- Baking Powder: In addition to the yeast, baking powder helps to give the loaf a little more rise to make it fluffier.
- Eggs: I have not tested this recipe with an egg-replacer, so I don’t know how it will turn out. (If you do try it without eggs, please leave a comment letting me know how it goes, thank you!)
How to Make Brown Rice Bread (Step by Step)
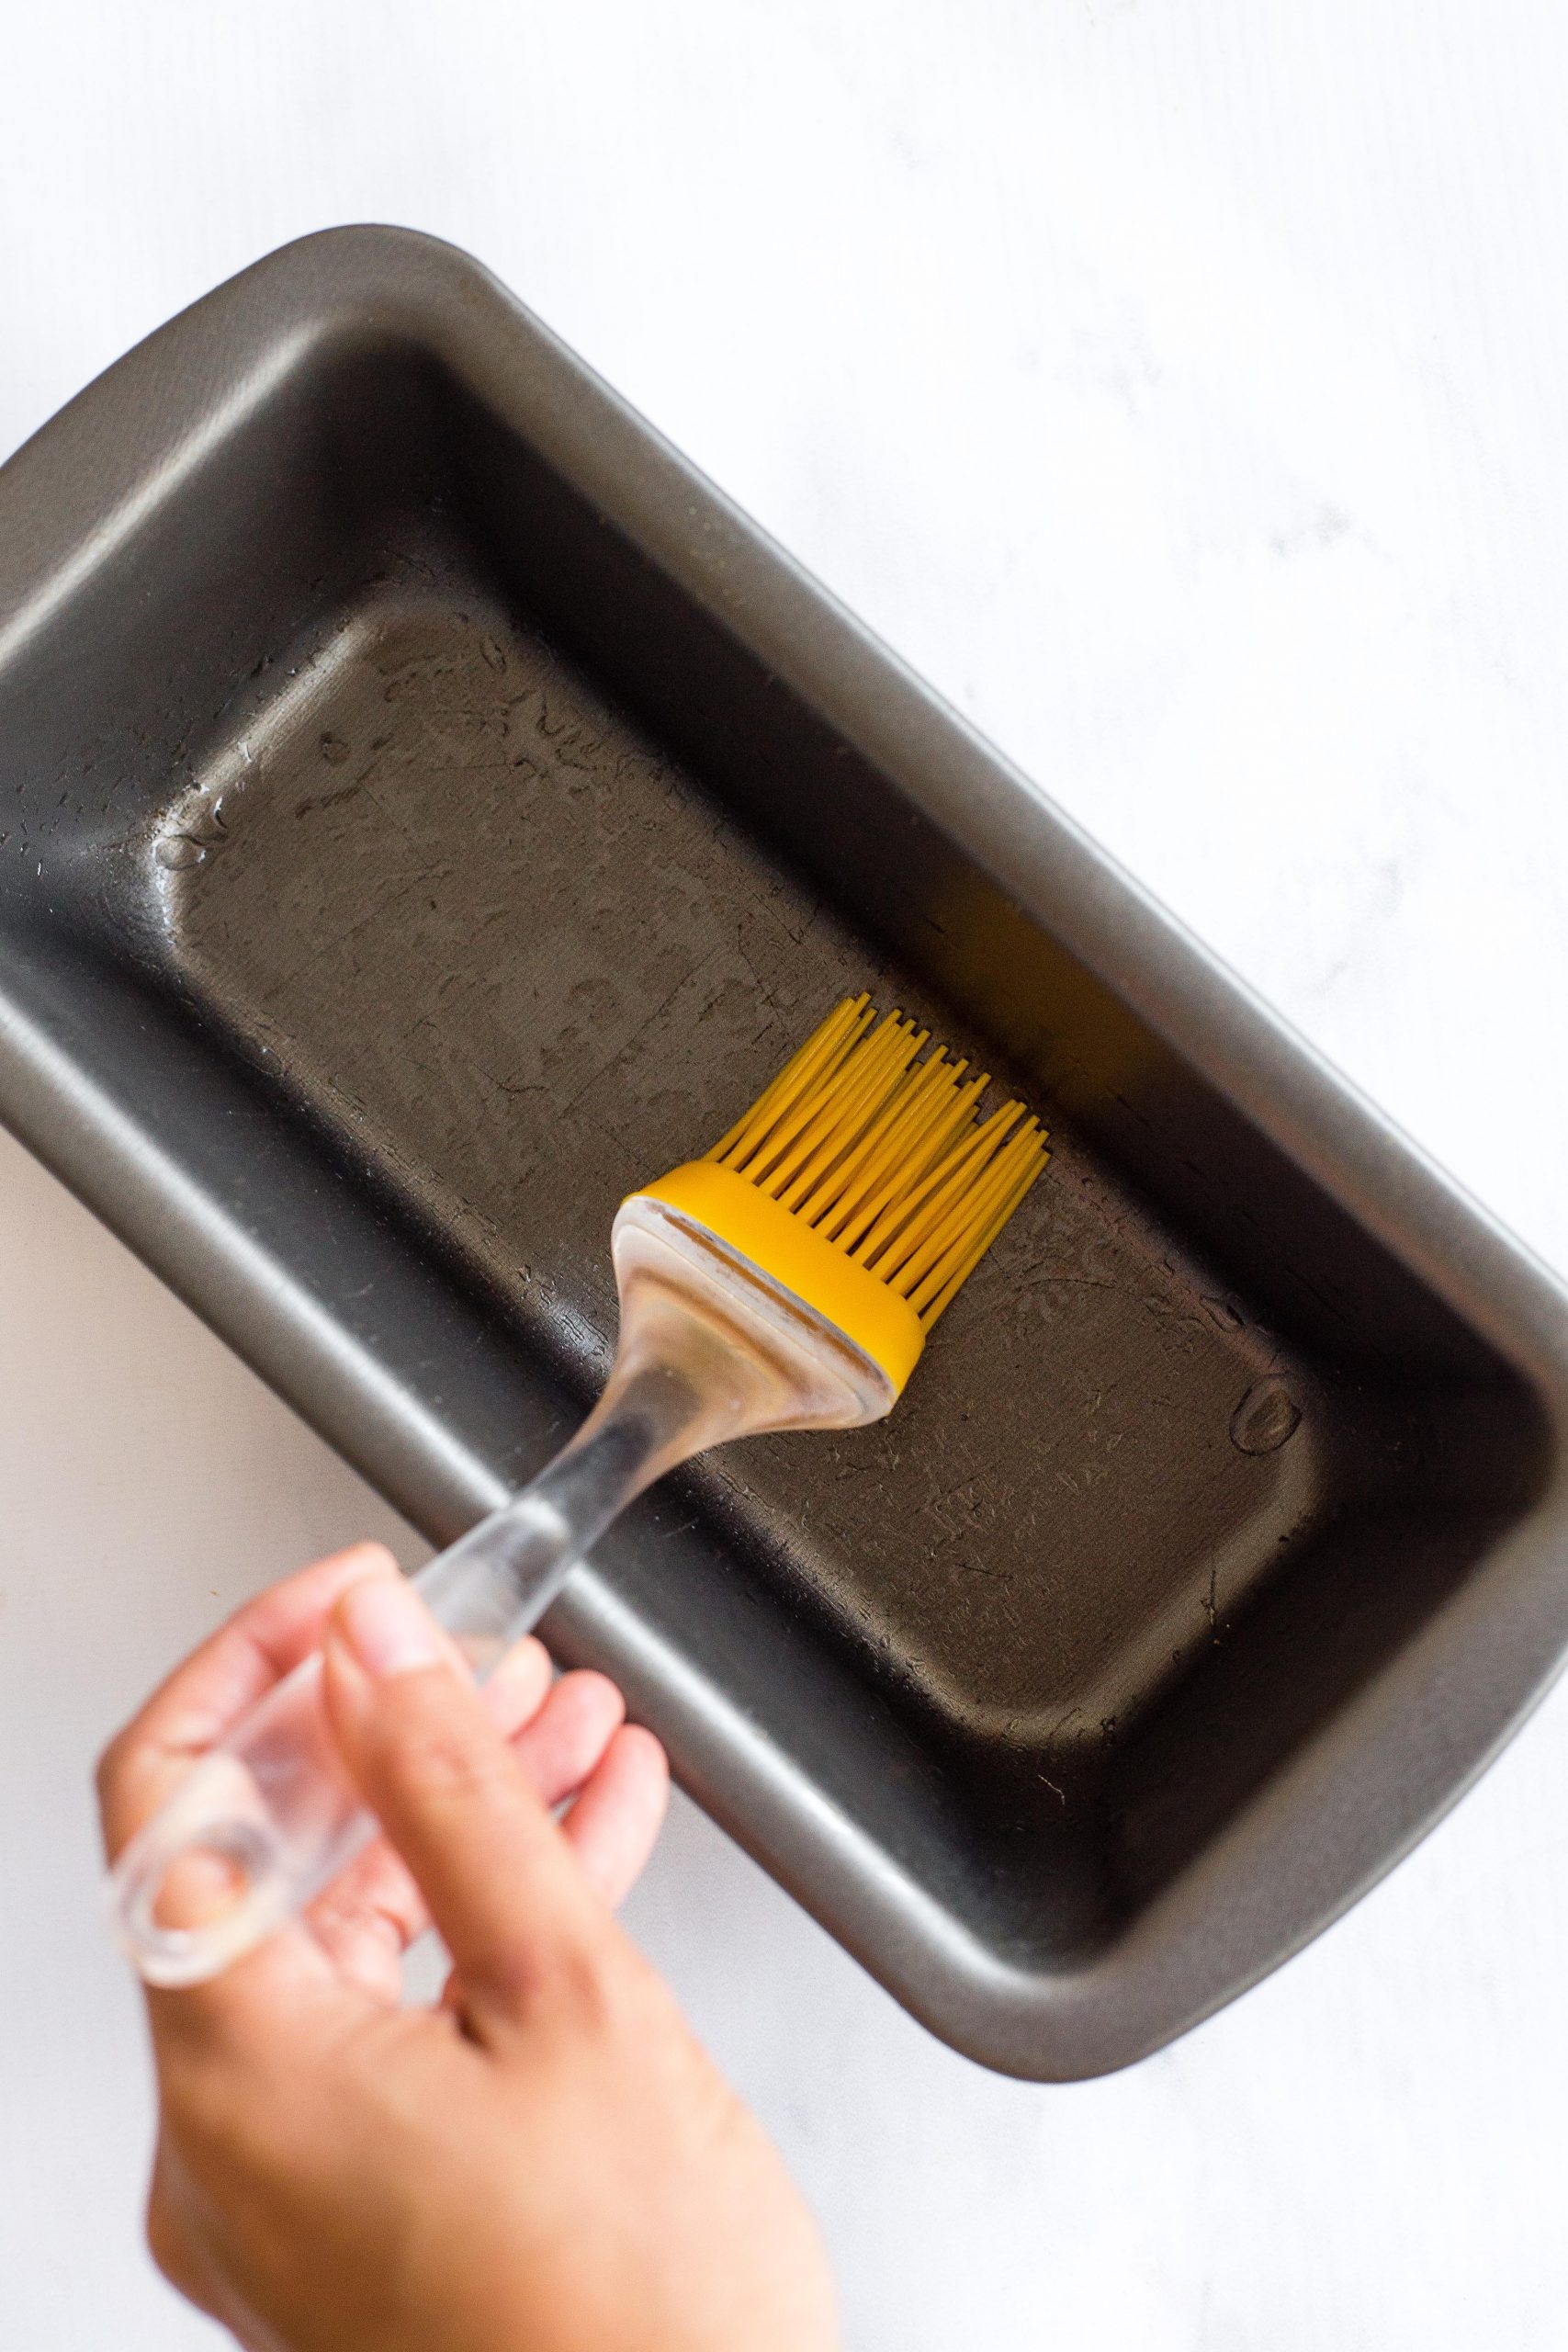
1. Grease
Grease an 8″x4″ metal loaf pan.
2. Whisk Dry Ingredients
In a large mixing bowl, whisk the brown rice flour, psyllium husk powder, instant yeast, sugar, baking powder, xanthan gum, and salt together.

3. Add Liquid Ingredients to Form Dough
Add the warm water, sunflower oil, and eggs to the dry ingredients and mix well to get a wet and shaggy dough (the dough is supposed to be shaggy, so don’t worry).

4. Transfer to Pan
Transfer the dough to the greased loaf pan and smooth out the top with a wet spatula.

5. Let Dough Rise
Cover the dough pan with a kitchen towel and let the dough rise approximately 30 to 40 minutes in a warm, draft-free place until it has almost doubled in size. (Tip: I like to place the loaf pan in my microwave with the power off – it creates the perfect draft-free and warm environment for rising dough).

6. Preheat Oven
During the last 10 minutes of the dough rising, preheat oven to 350F and adjust the oven rack to the middle position.
7. Bake
Bake the dough for 40 to 50 minutes until bread has turned dark brown on top and the loaf sounds hollow when tapped. Remove loaf from the oven.

8. Cool Completely Before Slicing
Let the loaf cool for 10 minutes in the loaf pan, before removing and letting it cool completely on the wire rack. Slice only once the loaf has completely cooled.

Dish by Dish Tips and Tricks
- Use a Metal Pan: I highly recommend using a metal loaf pan as it will ensure that the bottom and sides of your loaf will be uniformly brown, and that the bottom of the bread is fully-cooked does not stick to the pan (which may happen if you use a glass loaf pan).
- Use a Serrated Knife to Slice: Make sure to use a serrated bread knife (a knife with ridges) to slice the loaf to prevent the loaf from being squashed (which will happen if you use a knife with smooth edges).
- Slice and Freeze: A tip to ensure you have sliced bread ready always is to slice the bread and then wrap it in plastic wrap and freeze. Whenever the craving strikes for homemade bread, simply remove a slice or two and toast!
Recipe FAQs:
Since this recipe is specifically to make brown rice bread, I wouldn’t recommend swapping it with white rice flour, as the textures are different (white rice flour is starchier than brown rice flour). If you would like to make this with other gluten-free flours with a texture similar to brown rice flour, you can use millet flour or sorghum flour in equal quantities.
To store this bread, simply place the bread in an airtight container and store in the refrigerator for up to 5 days.
Yes, of course you can freeze this gluten-free rice bread. Simple wrap the cooled loaf in plastic wrap and then freeze for up to 3 months. Let the bread thaw completely overnight in the refrigerator before slicing.

Other Bread Recipes You’ll Love:



P.S. If you try this recipe, I’d love for you to leave a star rating below, and/or a review in the comment section further down the page. I always appreciate your feedback. Be sure to check out my entire Recipe Index for all the recipes on the blog. You can also follow me on Pinterest, Facebook or Instagram! Sign up for my Email List to get fresh recipes in your inbox each week!
Soft, Fluffy Brown Rice Bread (Gluten-Free, Dairy-Free)
- Total Time: 1 hour 40 minutes
- Yield: 12 servings 1x
- Diet: Gluten Free
Description
This soft and fluffy brown rice bread is simple to make, and is great for making sandwiches, or toasting and spreading with butter and jam. Made with brown rice flour for extra fiber, this easy yeast bread is totally gluten-free and dairy-free too.
Ingredients
- 2 cups brown rice flour
- 1 3/4 cups warm water (approximately 105F – 115F)
- 1/4 cup sunflower oil
- 1/4 cup psyllium husk powder
- 1 tablespoon instant yeast
- 2 tablespoons sugar
- 3/4 teaspoons xanthan gum
- 2 eggs, room temperature
- 1 teaspoon baking powder
- 1/2 teaspoon salt
Instructions
- Grease: Grease an 8″x4″ metal loaf pan.
- Whisk Dry Ingredients: In a large mixing bowl, whisk the brown rice flour, psyllium husk powder, instant yeast, sugar, baking powder, xanthan gum, and salt together.
- Add Liquid Ingredients: Add the warm water, sunflower oil, and eggs to the dry ingredients and mix well to get a wet and shaggy dough (the dough is supposed to be shaggy, so don’t worry).
- Transfer to Pan: Transfer the dough to the greased loaf pan and smooth out the top with a spatula.
- Let Dough Rise: Cover the dough pan with a kitchen towel and let the dough rise approximately 30 to 40 minutes in a warm, draft-free place until it has almost doubled in size. (Tip: I like to place the loaf pan in my microwave with the power off – it creates the perfect draft-free and warm environment for rising dough).
- Preheat Oven: During the last 10 minutes of the dough rising, preheat oven to 350F and adjust the oven rack to the middle position.
- Bake: Bake the dough for 40 to 50 minutes until bread has turned dark brown on top and the loaf sounds hollow when tapped. Remove loaf from the oven.
- Cool Completely: Let the loaf cool for 10 minutes in the loaf pan, before removing and letting it cool completely on the wire rack. Use a serrated bread knife to slice once the loaf has completely cooled.
Notes
- Brown Rice Flour: I like making my own 5-minute homemade brown rice flour, but you can easily buy it online instead. Since this recipe is specifically to make brown rice bread, I wouldn’t recommend swapping it with white rice flours, as the textures are different (white rice flour is starchier than brown rice flour). If you would like to make this with other gluten-free flours with a texture similar to brown rice flour, you can use millet flour or sorghum flour in equal quantities.
- Warm Water: Make sure your water is between 105F – 115F. The water needs to be warm enough to activate the yeast, but not so hot that it kills the yeast.
- Sunflower Oil: I used sunflower oil because that’s what I always have on hand. Alternatively, you can use any neutral vegetable oil.
- Psyllium Husk Powder: Psyllium husk powder is essential in the recipe for binding the ingredients and creating the beautiful dome-shape loaf, and I do NOT recommend substituting it with any other ingredient. If you have psyllium husks, you can grind very finely to get a fine psyllium husk powder.
- Sugar: Sugar is required as food for the yeast to feed on so the yeast will be activated and make the bread rise. Do not leave it out.
- Instant Yeast: I like using instant yeast because it doesn’t need to be activated beforehand.
- Xanthan Gum: Since this is a gluten-free recipe, xanthan gum is required as a replacement for gluten to help bind the ingredients together.
- Baking Powder: In addition to the yeast, baking powder helps to give the loaf a little more rise to make it fluffier.
- Eggs: I have not tested this recipe with an egg-replacer, so I don’t know how it will turn out. (If you do try it without eggs, please leave a comment letting me know how it goes, thank you!)
- Use a Serrated Knife to Slice: Make sure to use a serrated bread knife (a knife with ridges) to slice the loaf to prevent the loaf from being squashed (which will happen if you use a knife with smooth edges).
- Storing/Freezing: To store, place the loaf in an airtight container and store in the refrigerator for up to 5 days. To freeze, wrap the cooled loaf in plastic wrap and freeze for up to 3 months. Let frozen loaf thaw completely in the refrigerator overnight before slicing.
- Adapted from: Eat Beautiful
- Prep Time: 10 mins
- Rising Time: 40 mins
- Cook Time: 50 mins
- Category: Bread
- Method: Baking
- Cuisine: American
Is this recipe adaptable as blender bread?
Hi Rashidah! I’ve never made the dough for this bread in a blender before, but I believe you should be able to do so without issues! Would love to hear how it goes if you do make it later. Hope to see you around the blog again soon!
Nice that there are so many comments here. I’m looking for a specific answer to the question: “how much of Bob’s Red Mill Egg Replacer”? I want to try this but can’t use eggs.
Hi Sheila! This is what I found on the Bob’s red mill website:
To Replace One Whole Egg:
1 Tbsp Gluten Free Egg Replacer
2 Tbsp Water
Since this brown rice bread recipe uses 2 whole eggs, you would need to use 2 tablepoons egg replacer + 4 tablespoons water. Hope this helps!
Hi Felicia! I don’t see a space where I can make an original comment so am sticking it here, hope you find it ok!
I have never seen baking bread recipes with 1 tablespoon of yeast, and because I used activated I had to increase to 1.25 TBS of activated yeast, but I followed the recipe exactly to see how it would come out and play with it from that point. I added the baking powder as well. When it was time for it to rest and raise, at around 15 minutes my dough was already one inch plus over the top of the 8×4 pan, and my gut said to put it into the oven but I wanted it to go a little closer to the recipe so I let it raise more and put it in the oven around 22 minutes after rest/raise. I took it out and it has collapsed considerably in the center. I read some other place that this can be from over proofing? Do you think this is what happened? If I leave out the baking powder next time do you think that might help me have a greater control of the rise/time? It is still cooling so I can’t say how it tastes or the crumb looks but my husband is circling like a shark waiting because he says it SMELLS so GOOD!
Hi Amy! Thanks for your comment! Yes, I believe the collapse after baking was due to over proofing. So depending on the humidity and how warm your room temperature is, the dough may take longer or shorter to rise. It seems your dough rose faster than the time required in the recipe, and your gut was probably right to put it in the oven when it was already at the top of the pan. You could try reducing the baking powder by half, but I believe the prob was more overproofing, and maybe a dough that was too wet – you can try reducing the amount of liquids by 1/4 the amount. I’d suggest watching the dough closely next time, and then once the dough is almost at the top of the pan, put it in the oven and bake.
Fingers crossed that you and your hubby enjoyed the bread in the end despite the collapse in the center!
THE BEST sandwich bread I have ever made and I always bake with wheat!!! It is moist, it is bendable, it is so tasty and takes on mayo and sliced chicken like a champ!! The only issue was the collapse in the center but I am going to follow your response and listen to my gut.. in Miami we are very humid here so I think I do agree about the over proofing… will get back when I do my second loaf! Thanks so much for your reply and assistance
PS: I am wondering WHY my bread is so DARK? it is a very dark brown and I feel it is from the psyllium but your photos show such a nice lighter cream colored/tan bread, that’s what I want LOL, do you have any idea what I might be doing to create this very dark bread? thanks
Hi Felicia.. AmyF again.. forgot to ask another question: Do I have it wrong, or are you asking for 1/4 of the ground psyllium husk which is a powder? If I have that wrong maybe that is why my bread is super dark brown? Other recipes I have discovered while learning about gluten free generally call for teaspoons to a single tablespoon so with zero experience, I am asking if 1/4 cup is what you use and still get that nice light colored loaf, thanks!
Hi Amy! Regarding the color of the loaf, it could depend on the brand of psyllium husk powder that you used. Maybe try using just 2 tablespoons instead of 1/4 cup. I know that the NOW psyllium husk brand doesn’t make bread turn out (or purple). The color shouldn’t affect the taste, but yes, a white/creamer looking loaf will be nicer 🙂
Hi, I have seen brown rice flour in the store with xanthan gum already in it. Would that be sufficient, or do I still need to add more? Also, could I use egg whites instead of whole eggs?
Thanks.
Hi Aileen, if the brown rice flour at your store already has xanthan gum, then feel free to leave it out! 🙂 And yes, for every whole egg you wish to substitute, please use 2 egg whites. Hope this helps!
xx,
Felicia
Thanks, Felicia!
You’re most welcome Aileen!
Hi Felicia!
Thank you for your lovely recipe!!!
I did follow it and it came out moist , and really tasty. I love it. I am new in gluten free bread, had some rice flour which I wanted to try and finally I found a recipe .
My little one loved it and ate a slice straight away!
And she is being really fussy with food lately!
Thanks
Is there any way I could ad a photo?
Hi Silvia!!
I’m soooo happy to hear that you and your little one enjoyed this brown rice bread! 🙂 Thank you for taking the time to leave such a lovely comment. I don’t think you can add a photo in the comments section, but you can always tag me on Instagram (my hand is @felicialimhz).
Hope to see you around the blog again sometime soon!
xx,
Felicia
I like this recipe, thhe bread came out well.
I find the 1/4 th cup of oil too much and affecting the flavor. Can you say why the oil and why so much. Can I use less oil without affecting the result?
Hi Scott, the oil helps to keep the bread moist, however if you find it’s too much for your taste, you could reduce it to 1/8 cup and it shouldn’t be an issue. Perhaps it will require 5 to 10 minutes less baking time in the oven. Hope this helps, and thanks for your note! Hope to see you on the blog again sometime soon 🙂
It came out very crumply could this be because I used flaxseeds? When I eat it, it just falls apart 🙁 Any tips are welcoome
Hi Hetty, I’m assuming you used flaxseed egg to replace the eggs? Did you add xanthan gum and psyllium husk powder? Those are important in holding the ingredients together.
I only have whole psyllium husk can I grind it to make powder or can I sub it with whole at a different amount?
Hi Britt! Yes, please grind the whole pysllium husks into as fine a powder as possible (either in your coffee grinder or high-speed blender) and use the amount specified in the recipe. Hope this helps!
I made this exactly to the recipe and it turned out just like the picture. I did take it out of the pan and cooked it on the oven rack for the last 5 minutes as I saw in one of your replies. The bread is moist and great flavour. Really the best gluten free bread recipe yet… and I have tried a lot. Thanks for your recipe.
Hi Jane, thank you so much for your lovely comment! So happy you enjoy this bread, and that you think it’s the best gluten-free bread recipe after trying a lot!! Hope to see you around the blog again sometime soon!
My bread comes out dense and not fluffy.( fluffy brown rice recipe)
Hi Lucy!
Sorry to hear your bread turned out dense. I know many readers have good success with this recipe, so let’s try to troubleshoot. It could be that your yeast is expired (if the bread didn’t rise because the yeast is not working, it will be dense. to check that your yeast is working, combine it with warm water and sugar and it should start to be foamy after sitting for 5 minutes). Alternatively, your water might not have been warm enough (it has to be 105-115F for the yeast to activate, if too cold it will not activate and hence not create the gases needed to make the dough rise). If you environment is too cold (i.e. wintertime and the room temp is generally lower than normal), it will take a longer time for the bread to rise to almost double, so you can just let it rise for a longer time in colder temperatures.
Also, did you omit the sugar? (if you left the sugar out it might be the reason). Sugar is required as food for the yeast to activate.
Hope this helps!
I made this bread. It was very dense.I used flaxseed meal instead phylllium husk I didn’t have psyllium husk. Someone told me that flaxseed meal was a substitute. Do you think that was the cause of a dense bread ?
Also used too much xanthan gum. I don’t know what would 3/4 of a teaspoon is.
Hi Lucy! Sorry to hear your bread turned out dense! I definitely wouldn’t recommend substituting psyllium husk powder for anything (I find that using it really makes a difference in how fluffy the loaf turns out). Psyllium husk powder helps to bind the ingredients better and creates the little pockets of air that you find in a fluffy loaf. Regarding xanthan gum, to measure 3/4 teaspoon you can use 3 times of a 1/4 teaspoon measuring spoon.
How full should the loaf pan be before rising? I don’t have the proper size pan, so my bread has been tasty but never turned out visually. It’s either thin (in my 9×5) or spilling out of the pan then sinks in the middle (8×3.5)..
Hi Mataya! In the photos I’m using an 8″ x 4″ loaf pan, and the dough fills up just slightly more than 1/2 the pan before rising.
If you find that the bread tends to sink in the middle after baking, it could be that it rose too much before being baked. I usually try not to let the dough rise much more than the top of the pan before baking. Hope this helps!!
This bread was amazing! Due to allergies in the family, I had to use two flax eggs in place of the eggs, and I only had regular yeast (not rapid) but even with those changes, this recipe came out fantastic. We’ve been on the hunt for a good bread recipe and we’ve finally found it! Thanks for sharing.
Hi Stephanie!
So happy to hear that you and your family love this bread, and it’s great to know that it worked just as well with regular yeast! 🙂 Thanks for your lovely note, and hope to see you around the blog again sometime soon!
xx,
Felicia
Hi! I live in a dry environment. Would you recommend adding a tray of water while baking to maintain moisture in this bread, as with other rice flour- based breads?
Hi T,
This bread is naturally quite moist so I don’t think it’s necessary to add a tray of water while baking. You can check to see whether the texture of your bread dough looks wet and stick (similar to the photos in this post), and if it feels too dry, you can add a bit more water (maybe 2 tablespoons more) to the dough before baking. Hope you enjoy it as much as we do!
How many eggs in the rice flour recipe?
Hi Brenda, this recipe requires 2 eggs. To see the exact measurements and quantities, scroll down to the recipe card at the bottom of the post (there are also ingredient notes at the bottom of the recipe card). Alternatively, you can click the “Jump to Recipe” button at the start of the post. Hope this helps dear!
Hii.
Can I use the same quantity of ingredients when making the bread in bread machine?
Hi Amrita!
Yes you can. Make sure you use the “Gluten-free bread” setting in your bread machine.
Hope you enjoy this bread!
I tried this recipe with egg replacer and it comes out wonderful! (I used bobs red mill egg replacer.) I love this gf bread recipe so much, I have been making it about twice a week for my toddler and I. We just discovered last year that we have some food allergies and finding a bread without whipped egg whites was hard. Buying frozen bread that is hard to separate made me dread it and it lacks taste. This recipe has been so great and now I’m even making my own brown rice flour. Thank you for all the tips!
Hi Jonell!
Thank you so much for your lovely note, it makes me so happy to know that you and your toddler enjoy this brown rice bread so much! Love knowing that it works great with Bob’s Red Mill egg replacer too. I know what you mean about buying frozen GF bread (it’s usually hard and dense and tasteless)! Making our own is so much better, and really not that hard at all!
Hope to see you around the blog sometime soon and happy 2022!
xx,
Felicia
Hi Jonell, just wondering how much egg replacer you used in this recipe? I am looking for GF bread recipes that are dairy free and egg free. Any advice you have would be greatly appreciated.
Jonell says
January 04, 2022 at 3:43 pm
I tried this recipe with egg replacer and it comes out wonderful! (I used bobs red mill egg replacer.) I love this gf bread recipe so much, I have been making it about twice a week for my toddler and I. We just discovered last year that we have some food allergies and finding a bread without whipped egg whites was hard. Buying frozen bread that is hard to separate made me dread it and it lacks taste. This recipe has been so great and now I’m even making my own brown rice flour. Thank you for all the tips!
★★★★★
You are most welcome!! So glad you enjoy the bread as much as we do 🙂