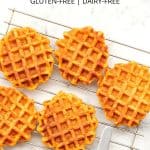
Easy Gluten-Free Pumpkin Waffles (Dairy-Free)
These easy gluten-free pumpkin waffles are bursting with the flavor of pumpkin and tastes of fall, and make a delicious breakfast on a crisp fall morning or a lovely dessert to celebrate a special occasion. Dairy-free too.
")
Want to save this recipe?
Enter your email & I’ll send it to your inbox. Plus, get great new recipes from me every week!
Jump to:
- Pumpkin Season
- Cooking with Pumpkin
- Waffles Hot off the Iron
- Why This Recipe Works:
- Ingredients You’ll Need + Notes/Substitutions
- How to Make Gluten-Free Pumpkin Waffles (Step by Step)
- Dish by Dish Tips/Tricks:
- Recipe FAQs:
- Other Waffle Recipes To Enjoy:
- Gluten-Free Pumpkin Recipes You’ll Love:
- Easy Pumpkin Waffles Recipe (Gluten-Free, Dairy-Free)
Pumpkin Season
Whenever fall rolls around, the shorter days, cooler weather and falling leaves are always accompanied by an abundance of fall bounty at our local supermarkets.
The first time we experienced fall in the US, when we were still living in the West End neighborhood in Washington D.C., was also the first time we had a taste of full-on pumpkin season.
At our local Trader Joe’s, I was thrilled to see an entire section dedicated to all sorts of squash (from spaghetti squash, acorn squash, yellow squash, butternut squash, delicata squash and kabocha squash).
The entrance of the supermarket was also surrounded by pumpkins of all shapes, sizes and colors! I’ve never seen so many pumpkins (so large and so small) in my life; and I honestly had no idea that so many varieties of pumpkins even existed! I even forced Juan to snap a photo of these cute adorable pumpkins just sitting around and waiting for a home.
Cooking with Pumpkin
To be completely honest, up until that fall in 2015, I’d never even cooked with some of these squashes yet, nor even heard of some of them before. It was also the first time I cooked with pumpkin. And I was beyond excited to try out all the different pumpkin recipes that I’d been pinning before that.
So I made all things pumpkin, literally. From homemade pumpkin puree, to sweet desserts such as pumpkin muffins, pumpkin scones, no-bake pumpkin cheesecake, crustless pumpkin pie, and pumpkin bread, to savory dishes such as creamy pumpkin soup, easy pumpkin gnocchi and pumpkin risotto.
")
Waffles Hot off the Iron
I’m a huge fan of waffles and I’ve made quite a few different types over the past few years. From these basic gluten-free waffles, gluten-free oat waffles, as well as these 5-ingredient banana flaxseed waffles, and even these savory mashed potato waffles, I love them all!
And now I’m sharing this recipe for gluten-free pumpkin waffles because what’s any season without a big plate of these waffles?
Why This Recipe Works:
- Simple Ingredients: The main ingredients required for these gf pumpkin waffles are easily accessible at the local grocery stores (nothing fancy required!).
- Easy to Make: Preparing the pumpkin waffle batter is as simple as mixing the dry and wet ingredients together, then cooking the batter in the waffle maker. Plus, I’ll teach you a cool trick to ensure you get crispy waffles all the time!
- Totally Gluten-Free & Dairy-Free: The best part is that these healthy pumpkin waffles are 100% gluten-free and dairy-free too! This means that even those with Celiac disease or gluten or lactose intolerances are able to enjoy them without issues!
Ingredients You’ll Need + Notes/Substitutions
Here’s an overview of the ingredients required for this gluten-free dairy-free pumpkin waffles recipe.
(For exact measurements, please scroll down to the printable recipe card at the bottom of this post.)
- Pumpkin Puree: I always recommend using fresh homemade pumpkin puree because it is tastier and does not contain the additives and preservatives that come with the canned version. However, if you only have access to canned pumpkin puree (NOT the same as pumpkin pie filling), it will work just as well.
- Eggs: Eggs are essential in binding the ingredients in the pumpkin waffle batter together, so make sure you add them in!
- Sunflower Oil: I like using sunflower oil because I always have a bottle of it on hand. You can also use melted coconut oil or vegan butter or another vegetable oil if you prefer. Alternatively, if you are not lactose intolerant, go ahead and use regular melted butter instead.
- Honey: I’ve used honey in this recipe, but feel free to substitute honey for equal amounts of agave nectar or maple syrup if you prefer.
- Vanilla Extract: I like adding a bit of vanilla extract for extra flavor, but if you’re not a fan of vanilla, feel free to leave it out.
- Almond Milk: I like using my 5-minute homemade almond milk, but go ahead and use any other non-dairy milk (such as cashew milk, oat milk, tigernut milk, or rice milk). Alternatively, if you are not lactose-intolerant, go ahead and use regular milk instead.
- Gluten-Free Flour: I recommend using a good-quality gluten-free all-purpose flour blend that is made up of lighter flours/starches (such as rice flour, tapioca starch, potato starch or corn starch) to ensure a lighter and fluffier final texture. I do NOT recommend using a gluten-free flour blend that is made up of heavier flours (such as garbanzo bean flour) as that will result in a denser final texture.
- Spices: I like using a mix of ground cinnamon and ground nutmeg for a beautiful fall flavor. Alternatively, you can also use 3/4 teaspoon of pumpkin pie spice instead.
- Baking Powder: Baking powder is the only leavening agent used in this gluten free pumpkin waffles recipe and helps the waffle batter to rise and be airy, so make sure you add it in! If you are Celiac or gluten-intolerant, make sure to use certified gluten-free baking powder.
- Dairy-Free Heavy Cream: I used whipped dairy-free heavy cream as a topping to keep this recipe dairy-free, but if you are not lactose-intolerant, go ahead and use regular whipped cream instead!
")
How to Make Gluten-Free Pumpkin Waffles (Step by Step)
1. Preheat Waffle Iron
Preheat your waffle iron and brush it with oil or grease it with nonstick cooking spray.
2. Mix Wet Ingredients
In a large bowl, combine pumpkin puree, eggs, oil, honey, vanilla extract and milk and mix well.
3. Whisk Dry Ingredients
In another bowl, mix the gluten-free all-purpose flour, ground cinnamon, ground nutmeg, and baking powder together.
4. Combine Wet and Dry Ingredients to Get Waffle Batter
Combine the dry ingredients with the wet ingredients until a homogeneous batter is achieved.
5. Cook Waffle Batter
When waffle iron is ready, brush the waffle iron with a bit of oil, and pour about 1/2 to 3/4 cup of batter onto the iron (enough to cover up 90% of the surface area) and close the waffle iron.
Let the batter cook for 4 to 5 minutes until no more steam is released from the waffle iron. Lift up the top of the waffle iron and check waffles – if waffles are not yet crispy and need bit more time, close and let cook for another 2 to 3 minutes.
6. Repeat Until All Batter if Used Up
Remove waffles from iron and repeat until all the batter is used up. While cooking the rest of the waffles, keep cooked waffles in a pre-heated oven at 220F (100C) to keep them crispy.
7. Drizzle and Serve
Serve waffles warm drizzled with honey or maple syrup and a spoonful of freshly whipped cream.
Dish by Dish Tips/Tricks:
- For Crispy Waffles, Use The Steam Indicator Trick: I’ve found that using the waffle iron’s indicator light is often inaccurate as each waffle batter is different and has varying amounts of liquid, which means each waffle batter takes a different amount of time to be fully cooked. In my experience, the best way to ensure that you get a crispy exterior and a fully-cooked interior is to let the pumpkin waffles cook until no more steam is being emitted from the waffle iron. Only then do you open the waffle iron and remove the waffles.
- Make Pumpkin Pancakes: If you wish, you can use the same batter to make pumpkin pancakes instead of waffles. Simple pour 1/2 cup of the batter into the middle of a greased nonstick skillet over medium high heat and cook for 2-3 minutes until you see bubbles rise to the surface. Flip pancake over and cook 1-2 more minutes until the other side is also cooked.
- Freeze and Reheat: Feel free to make a batch or two and freeze so that you can enjoy homemade waffles on busy weekday mornings!
- Optional Add-Ins: If you like, go ahead and add in some chocolate chips to the waffle batter.
Recipe FAQs:
To store, place any leftover pumpkin waffles in an airtight container and store for up to 3 days in the refrigerator. Reheat the waffles in a toaster oven before serving.
Yes, you can definitely freeze these gluten-free pumpkin waffles! Simply place any leftover waffles in separate layers (separate each layer with parchment paper or a piece of plastic sheet) in a freezer-safe container or freezer bags and freeze for up to 3 months. Reheat the frozen waffles in a toaster oven before serving.
I like serving these pumpkin spice waffles with freshly whipped coconut cream and a drizzle of honey. You could also sprinkle on some chopped pecans for a crunchy contrast.
")
Other Waffle Recipes To Enjoy:
- Easy Gluten-Free Waffles (Dairy-Free)
- Gluten-Free Oat Waffles
- 5-Ingredient Banana Flaxseed Waffles (Gluten-Free, Dairy-Free)
- Mashed Potato and Spring Onion Waffles (Gluten-Free, Dairy-Free)
Gluten-Free Pumpkin Recipes You’ll Love:


P.S. If you try this recipe, I’d love for you to leave a star rating below, and/or a review in the comment section further down the page. I always appreciate your feedback. Be sure to check out my entire Recipe Index for all the recipes on the blog. You can also follow me on Pinterest, Facebook or Instagram! Sign up for my Email List to get fresh recipes in your inbox each week!

Easy Pumpkin Waffles Recipe (Gluten-Free, Dairy-Free)
- Total Time: 45 minutes
- Yield: 8 waffles 1x
- Diet: Gluten Free
Description
These easy gluten-free pumpkin waffles are bursting with the flavor of pumpkin and tastes of fall, and make a delicious breakfast on a crisp fall morning or a lovely dessert to celebrate a special occasion. Dairy-free too.
Ingredients
- 3/4 cup pumpkin puree
- 2 large eggs
- 1 tablespoon sunflower oil, plus more for greasing the waffle iron
- 2 tablespoons honey, plus more for drizzling
- 1 teaspoon vanilla extract
- 1 cup almond milk
- 1 1/2 cups gluten-free all-purpose flour
- 1/2 teaspoon ground cinnamon
- 1/4 teaspoon ground nutmeg
- 3 teaspoons baking powder
- Whipped dairy-free heavy cream, for topping (optional)
Instructions
- Preheat: Preheat your waffle iron and brush it with oil or grease it with nonstick cooking spray.
- Mix Wet Ingredients: In a large bowl, combine pumpkin puree, eggs, oil, honey, vanilla extract and milk and mix well.
- Whisk Dry Ingredients: In another bowl, mix the gluten-free all-purpose flour, ground cinnamon, ground nutmeg, and baking powder together, then stir in the dry ingredients with the wet ingredients until a homogeneous batter is achieved.
- Cook Waffle Batter: When waffle iron is ready, brush the waffle iron with a bit of oil, and pour about 1/2 to 3/4 cup of batter onto the iron (enough to cover up 90% of the surface area) and close the waffle iron. Let cook for 4 to 5 minutes until no more steam is released from the waffle iron. Lift up the top of the waffle iron and check waffles – if waffles are not yet crispy and need bit more time, close and let cook for another 2 to 3 minutes.
- Repeat: Remove waffles from iron and repeat until all the batter is used up. While cooking the rest of the waffles, keep cooked waffles in a pre-heated oven at 220F (100C) to keep them crispy.
- Drizzle and Serve: Serve waffles warm drizzled with honey or maple syrup and a spoonful of freshly whipped cream.
Notes
Pumpkin Puree: I always recommend using fresh homemade pumpkin puree because it is tastier and does not contain the additives and preservatives that come with the canned version. However, if you only have access to canned pumpkin puree (NOT the same as pumpkin pie filling), it will work just as well.
Eggs: Eggs are essential in binding the ingredients in the pumpkin waffle batter together, so make sure you add them in!
Sunflower Oil: I like using sunflower oil because I always have a bottle of it on hand. Alternatively, you can also use melted coconut oil or vegan butter. If you are not lactose intolerant, go ahead and use regular butter instead.
Honey: I’ve used honey in this recipe, but feel free to substitute honey for equal amounts of agave nectar or maple syrup if you prefer.
Vanilla Extract: I like adding a bit of vanilla extract for extra flavor, but if you’re not a fan of vanilla, feel free to leave it out.
Almond Milk: I like using my 5-minute homemade almond milk, but go ahead and use any other non-dairy milk (such as cashew milk, oat milk, tigernut milk, or rice milk). Alternatively, if you are not lactose-intolerant, go ahead and use regular milk instead.
Gluten-Free Flour: I recommend using a good-quality gluten-free all-purpose flour blend that is made up of lighter flours/starches (such as rice flour, tapioca starch, potato starch or corn starch) to ensure a lighter and fluffier final texture. I do NOT recommend using a gluten-free flour blend that is made up of heavier flours (such as garbanzo bean flour) as that will result in a denser final texture.
Spices: I like using a mix of ground cinnamon and ground nutmeg for a beautiful fall flavor. Alternatively, you can also use 3/4 teaspoon of pumpkin pie spice instead.
Baking Powder: Baking powder is the only leavening agent used in this waffles recipe and helps the waffle batter to rise and be airy, so make sure you add it in! If you are Celiac or gluten-intolerant, make sure to use certified gluten-free baking powder.
Dairy-Free Heavy Cream: I used whipped dairy-free heavy cream as a topping to keep this recipe dairy-free, but if you are not lactose-intolerant, go ahead and use regular whipped cream instead!
Storing: To store, place any leftover pumpkin waffles in an airtight container and store for up to 3 days in the refrigerator. Toast the waffles before serving. To freeze, place the pumpkin waffles in a freezer-safe container or freezer bags (make sure to separate the waffles with plastic sheets to prevent them from sticking). Toast the frozen waffles until warm before serving.
Adapted from: Fit Foodie Finds
- Prep Time: 5 mins
- Cook Time: 40 mins
- Category: Breakfast, Dessert
- Method: Waffle Iron
- Cuisine: American


Wow! These were amazing! I used boiled sweet potatoes that I smashed with a fork until smooth. I used avocado oil because that’s all I had. I used 2 Tablespoons of coconut sugar instead of honey, and extra cinnamon and nutmeg! These came out so great! I hope to make a lot more and freeze them. Hopefully they freeze well. Thanks for a great recipe!
YAY! So happy to hear that you enjoyed this using sweet potatoes! Thank you for the great idea and for sharing the substitutions used 🙂 Happy cooking!!
Perfect recipe. Wouldn’t change a thing except to double the recipe!
Don’t forget to include the oil in the batter (it’s not listed in the mixing steps).
So happy to see iron instructions; hubby and I have learned how to properly cook waffles today too!
Hi Sarah!
Thanks for the lovely note! Will add the oil in the instructions right now 🙂 And YAY to doubling the recipe and cooking waffles! They are always worthy of any celebration aren’t they! 😉 Hope to see you around the blog again sometime soon!
xx, F
So, so good! I loved the hint of cinnamon and nutmeg! We had these topped with almond butter, maple syrup and sliced pears. What recipe will we make next?
Hi Jenny!! YAY!! So happy to hear that you loved these waffles!! Next up, let’s see, have you tried the pear custard pie yet? One of our favorites. Also the crustless pumpkin pie! Oh, and my husband’s favorite fluffy gluten-free pancakes!
If you try any of these, I’d love to hear how it went! Have a great week! xx, F.
Hello Felicia,
Wow! You know what? I have your yummy hot pumpkin waffles with scoops of my favourite ice-cream – what a heavenly treat for me!
Thanks again with great love 🙂
Mum
Thank you mummy! Glad you enjoyed these waffles 🙂 Love you too!
Pumpkin waffles? Yes please! I had my first pumpkin flavored item of the season and it was the Pumpkin Dunkin Donuts KCup for coffee this morning. Now I’m craving more.
Hi Aileen! You’ve got plenty of pumpkins at the supermarkets to play around with! And pumpkin puree too!! 🙂 Enjoy pumpkin season!
Love your photos – This looks so yummy!
Thank you for your sweet words dear! Have a great week ahead!
PUMPKIN WAFFLES? Plus they’re gluten-free? I just have to try them!
Ginger Marie | http://www.thegingermarieblog.com
Hi Ginger, thanks for dropping by! Let me know what you think of the waffles after you try them!
I love the supermarket just like you. I got excited today because I found Meyer lemons. Although, I love shoes and handbags too. These look so yummy and I’m sure my kids would love them. Thanks for sharing.
Karen, thanks for dropping by! Actually I love shoes and handbags too, but things like meyer lemons and fresh cranberries get me even more excited! 🙂 Nice blog of yours btw! And congrats on Cooper!! 🙂