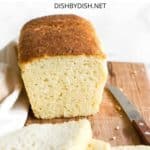
Soft, Fluffy Gluten-Free Bread (Dairy-Free)
Bread lovers rejoice! This soft and fluffy gluten-free bread recipe is moist, light, and oh so good! It’s super easy to make, has a short rise time, and a loaf is ready in just over an hour! No need to buy storebought bread ever again! You’ll want to eat this loaf with everything – think avocado toast, or spread with jam, or to make a sandwich or French toast. Dairy-free too.
")
Want to save this recipe?
Enter your email & I’ll send it to your inbox. Plus, get great new recipes from me every week!
Jump to:
- Months of Testing Gluten-Free Bread Recipes
- Super Easy Homemade Gluten-Free Bread Recipe
- Why This Recipe Works:
- What Makes This Gluten-Free Bread Fluffy?
- Ingredients You’ll Need:
- Ingredient Notes/Substitutions:
- How to Make Gluten-Free Bread (Step by Step)
- Dish by Dish Tips/Tricks:
- Recipe FAQs:
- What To Eat with This Gluten-Free Loaf:
- Other Gluten-Free Bread Recipes to Enjoy:
- Bake a Loaf of Bread Today!
- Soft Fluffy Gluten-Free Bread (Dairy-Free)
Months of Testing Gluten-Free Bread Recipes
I’ve always had a penchant for baking bread – and especially since we’ve been spending so much time at home this year, I’ve been testing and experimenting with so many bread recipes.
In the past few months, I’ve made gluten-free no-knead bread (beautiful and rustic!), rosemary focaccia (Juan absolutely loves this), easy gluten-free naan bread (a huge favorite among readers!), among plenty of other bread recipes that I’m still tinkering with and testing out.
")
Super Easy Homemade Gluten-Free Bread Recipe
One of my pet peeves with buying storebought gluten-free bread or baked gluten-free products is that they tend to be expensive, dense, or dry (and many times all of the above). That means that by making my own loaf, I can enjoy fluffy tender bread that is easy and inexpensive to make!
I can tell you with all certainty that this yeast bread recipe I’m sharing today (adapted from a recipe by Mama Knows Gluten Free) is probably one of the best gluten-free bread recipes I’ve ever made (and tried)! You probably won’t miss regular wheat bread anymore after trying this!
Why This Recipe Works:
- Simple, Affordable Ingredients: Most of the ingredients in this recipe are easily accessible and not costly. Which means that by making your own gluten-free bread in the comfort of your own kitchen, you can end up saving quite a bit (especially if you tend to eat quite a lot of GF bread like we do)!
- Short Rising Time: There’s a very short rise time of just 30 minutes, the dough rises beautifully, and it’s baked in a under an hour! Once baked, the top of the bread is a gorgeous golden brown and upon cooling, the loaf slices very easily and well.
- Incredibly Soft and Fluffy: Many gluten-free breads (whether store-bought or homemade) tend to be hard or dry (many times both). In this case however, this bread is flexible and moist, and fluffy and all things good, which is usually hard to come by with gluten-free baked goods. And that, my friends, is really nothing short of a miracle. Trust me. I’ve baked and eaten too many hard and dry gluten-free loaves, so when a recipe works out so beautifully, I can’t help but want to share it from the rooftops!!
- Totally Gluten-Free and Dairy-Free: Now only is this bread recipe gluten-free, it’s also totally dairy-free too, which means those with Celiac disease or on a gluten-free diet, and those with lactose intolerances can enjoy it without any issues!
")
What Makes This Gluten-Free Bread Fluffy?
A main reason why many gluten-free breads turn out dry is because there is not enough liquid in the dough. In this recipe, the total wet ingredients are in roughly the same quantity as the dry ingredients (almost a 1:1 ratio). While this results in a relatively wet and shaggy dough, it’s also the reason why this bread comes out flexible, soft and fluffy.
The eggs in the recipe, along with the apple cider vinegar and baking powder and yeast, also help the bread to rise more and achieve a dome-shaped top (whereas gluten-free breads without eggs generally do not hold the dome shape well and are often flat on top). If you wish to make a vegan loaf, here’s a well-loved gluten-free vegan bread.
")
Ingredients You’ll Need:
Here’s a visual overview of the ingredients required to make this delicious gluten-free bread. This recipe only requires 10 ingredients. Dry ingredients include all-purpose gluten-free flour, xanthan gum (leave out if your flour blend already has it), baking powder, instant yeast, sugar, and salt. Wet ingredients include vegetable oil, apple cider vinegar, non-dairy milk, and eggs.
For exact measurements and quantities, please scroll down to the recipe card at the bottom of this post.
")
Ingredient Notes/Substitutions:
- Gluten-Free All-Purpose Flour Blend: Not all gluten-free flours are created equal. I highly recommend using a good-quality gluten-free all-purpose flour blend that is made of lighter flours/starches (such as rice flour, tapioca starch, corn starch, or potato starch) to ensure a fluffier and lighter final texture. I do NOT recommend using gluten-free flour blends that include heavier flours (such as garbanzo bean flour) as that will result in a densier final texture.
- Xanthan Gum: Xanthan gum is a replacement for gluten in gluten-free baked goods, and is what helps to bind the ingredients together. If your gluten-free flour blend does not include xanthan gum, make sure you include it to get the best results.
- Baking Powder: To make this gluten-free bread light and fluffy, one of the secret ingredients is baking powder to help give the dough extra rise (on top of using yeast). If you are Celiac or gluten-intolerant, make sure to use certified gluten-free baking powder.
- Instant Yeast: I like using instant yeast because there’s no pre-activation time required. If you are not using instant yeast, make sure to activate the yeast according to the packet instructions.
- Sugar: I used granulated white sugar in this recipe. The sugar is required as “food” for the yeast to feed on and activate it to create the gases required to make the dough rise. By the end of the process, the sugar would have been consumed by the yeast and hence will not make the bread sweet.
- Sunflower Oil: I like using sunflower oil because I always have a bottle of it on hand. You can also use other vegetable oils in equal quantities (olive oil and avocado oil will work too). Alternatively, if you are not lactose-intolerant, you may also use melted butter in equal quantities.
- Apple Cider Vinegar: The apple cider vinegar creates an acidic environment that helps the gluten-free bread dough to rise even more. If you don’t have ACV on hand, you can also use white vine vinegar, rice wine vinegar, or fresh lemon juice.
- Almond Milk: I used my 5-minute homemade almond milk for this recipe, but you can also use my homemade cashew milk, or other non-dairy milk of your choice. If you are not lactose-intolerant, you can also use normal dairy milk instead. I find that using non-dairy milk gives the bread a richer taste, but I’ve also made it with warm water instead of milk and it comes out delicious as well! Make sure the temperature of the milk or water is between 105 to 115F, as the warmth is required to activate the yeast, but if the liquid is too hot, it might kill the yeast.
- Eggs: The eggs provide extra structure and also help the ingredients to bind better together. If you would rather not use egg yolks, you can also just use 3 egg whites as opposed to the 2 whole eggs. I have not tried making this gluten-free bread recipe without eggs, but if you are allergic to eggs or vegan, you can try using aquafaba or an egg-replacer (please let me know how it goes if you do that)!
How to Make Gluten-Free Bread (Step by Step)
1. Preheat and Grease
Preheat the oven to 350F and adjust the rack to the middle position. Grease an 8″x 4″ loaf pan with oil.
")
2. Whisk Dry Ingredients
In a large bowl, whisk the all-purpose gluten-free flour, xanthan gum (if using), baking powder, instant yeast, sugar, and salt together to combine.
")
3. Add Wet Ingredients to Form Wet and Sticky Dough
Add the vegetable oil, apple cider vinegar, warm milk and use a hand mixer or stand mixer to mix for one minute until combined. Add the beaten eggs and mix for another minute until you get a dough that resembles thick cake batter (the dough will be wet and sticky, but that’s completely fine).
")
4. Transfer Dough to Pan
Transfer the gluten-free bread dough to the prepared loaf pan and use a spatula to smooth out the top of the dough.
")
5. Let Dough Rise
Cover the dough with a kitchen towel, and let it rise for the next 30 minutes in a warm place that’s not exposed to drafts or wind, until it has roughly doubled in size.
(I like to place the pan in my microwave – without turning it on of course!)
")
6. Bake Until Golden Brown
Once the dough is done rising, lace the loaf pan on the middle rack of the oven and bake for 50 minutes, until the top is golden brown and the loaf sounds hollow when tapped.
")
7. Remove Loaf from Oven
Remove the loaf from the oven and let it cool down for 10 minutes in the pan before removing it to finish cooling on a rack (this will prevent the bottom from getting soggy).
Tip: If the bottom is not brown enough for your liking, you can simply bake the loaf for another 10-minutes bottom-side-up on the middle rack at 375F to brown it a little (it’s mainly for aesthetic purposes, and even if you don’t do it, the bread will still taste just as good).
")
8. Cool Fully Before Slicing
Allow the loaf to fully cool before slicing (this is important as the loaf may disintegrate if it’s still hot when you slice).
")
Dish by Dish Tips/Tricks:
- The Gluten-Free Bread Dough Will Be Wet and Sticky: Don’t be alarmed when you see that the bread dough is wet and shaggy and sticky and shapeless – strangely resembling cake batter as opposed to the firm and shapable traditional bread dough. It is completely normal and desired to have a wet bread dough when making gluten-free baked goods, because this will ensure a moister crumb once baked. Please DO NOT add more flour in an attempt to make the dough drier or more manageable. Gluten-free bread dough, unlike normal bread dough, does not required kneading, so it doesn’t matter that you can’t shape it with your hands since it will go straight into the loaf pan and take the shape of the pan.
- Extra Fiber and Binding Power: If you want even more fiber and more binding powder, you can mix in 2 tablespoons of psyllium husk powder with the dry ingredients.
- Add Flavor with Other Flours: If you would to add a bit more flavor and texture, you can replace 1/2 cup of the GF all-purpose flour blend with brown rice flour, sorghum flour, millet flour, buckwheat flour or almond flour.
- Pan Size Will Determine the Height of Bread: I like using an 8″ x 4″ loaf pan because the bread rises slightly more in this smaller pan. If you use a larger pan (such as a 9″ x 5″ pan), just note that the dough will spread out more and as a result will not rise as high compared to baking in a smaller pan.
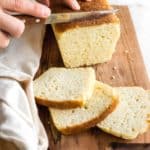
- Use a Serrated Knife for Slicing: It’s important to use a serrated knife, which has a scalloped, toothlike edge that is ideal for cutting through foods with a hard exterior and a soft interior, such as this loaf of soft fluffy gluten-free bread. Using a smooth-edged knife will place excessive pressure on the top of the loaf and squish or flatten the bread (and we don’t want that, especially after all we’ve done to make it rise and keep it fluffy)!
Recipe FAQs:
If you don’t plan on eating it immediately, gluten-free bread is best stored in an airtight container in the refrigerator, where it will keep for 5 to 7 days. I find it best to leave it unsliced and slice it only when you wish to eat it so it retain as much moisture as possible.
Yes! You can definitely freeze this gorgeous loaf of bread (especially if you plan to bake a few and keep on hand for future use). Once baked, let the bread cool completely before wrapping it in plastic wrap (unsliced) and freeze it in the freezer for up to 3 months. When you do decide to use the bread, I recommend thawing the loaf overnight in the refrigerator before slicing into it and toasting.
Many have asked which flour blend I use, since the flour blend makes a big difference in how the consistency of the bread turns out. Since I live in Buenos Aires, I use an all-purpose gluten-free flour brand from Argentina called Señor de Sipan, which is made primarily of corn starch, rice flour, and xanthan gum. For those of you who have access to Amazon, a good substitute is King Arthur Flour gluten-free all purpose flour or Pilsbury gluten-free flour.
")
What To Eat with This Gluten-Free Loaf:
This soft and fluffy gluten-free bread is so insanely versatile, you can literally have it alone (either toasted or not), or make French toast, or eat it with other foods, both sweet and savory. Here are some of our favorite foods to eat with it:
- Easy Apricot Jam (Gluten-Free Vegan)
- Easy Plum Jam (Gluten-Free, Vegan)
- Easy Kumquat Marmalade (Gluten-Free, Vegan)
- Mixed Berry Chia Seed Jam (Gluten-Free, Vegan)
- Strawberry Chia Seed Jam (Gluten-Free, Vegan)
- Easy Creamy Hummus (Gluten-Free, Vegan)
- Savory Pumpkin Soup (Gluten-Free, Vegan)
- Carrot Turmeric Soup (Gluten-Free, Vegan)
")
Other Gluten-Free Bread Recipes to Enjoy:
- 10 Easy Gluten-Free Bread Recipes to Make on Repeat
- Soft, Fluffy Buckwheat Bread (Gluten-Free, Dairy-Free)
- Fluffy Brown Rice Bread (Gluten-Free, Dairy-Free)
- Tender Sorghum Bread (Gluten-Free, Dairy-Free)
- Rosemary Focaccia Bread (Gluten-Free, Vegan)
- Easy Gluten-Free Naan Bread (No-Yeast, Dairy-Free)
- Easy Gluten-Free No Knead Bread (Dairy-Free)
- Flaxseed Coconut Bread (Gluten-Free, Paleo)
- Honey Oat Quick Bread (Gluten-Free, Dairy-Free)
- Easy Gluten-Free Sandwich Bread (Vegan)
Bake a Loaf of Bread Today!


P.S. If you try this recipe, I’d love for you to leave a star rating below, and/or a review in the comment section further down the page. I always appreciate your feedback. Be sure to check out my entire Recipe Index for all the recipes on the blog. You can also follow me on Pinterest, Facebook or Instagram! Sign up for my Email List to get fresh recipes in your inbox each week!
Soft Fluffy Gluten-Free Bread (Dairy-Free)
- Total Time: 1 hour 25 minutes
- Yield: 1 loaf 1x
- Diet: Gluten Free
Description
The best soft and fluffy gluten-free bread that is moist, light, and oh so good! Once you make this, you’ll never buy another loaf of storebought bread again! You’ll want to eat it with everything – think avocado toast, or spread with jam, or to make a sandwich or French toast. Dairy-free too.
Ingredients
- 2 1/2 cups gluten-free all-purpose flour
- 1 teaspoon xanthan gum (leave out if your flour blend already includes it)
- 1 teaspoon gluten-free baking powder
- 2 1/4 teaspoon instant yeast
- 2 tablespoons sugar
- 1 teaspoon salt
- 1/3 cup sunflower oil
- 1 teaspoon apple cider vinegar
- 1 1/2 cups warm unsweetened almond milk (or other non-dairy milk or water), between 105-110F
- 2 large eggs, beaten, room temperature
Instructions
- Preheat and Grease: Preheat the oven to 350F and adjust the rack to the middle position. Grease an 8″x 4″ loaf pan with oil.
- Whisk Dry Ingredients: In a large bowl, whisk the all-purpose gluten-free flour, xanthan gum (if using), baking powder, instant yeast, sugar, and salt together to combine.
- Add Wet Ingredients to Get Stick Dough: Add the vegetable oil, apple cider vinegar, warm milk and mix for one minute until combined. Add the beaten eggs and mix for another minute until you get a dough that resembles thick cake batter (the dough will be wet and sticky, but that’s completely fine).
- Transfer Dough to Pan: Transfer the dough to the prepared loaf pan and use a spatula to smooth out the top of the dough.
- Let Dough Rise: Cover the dough with a kitchen towel, and let it rise for the next 30 minutes in a warm, draft-free place, until it has roughly doubled in size.
- Bake Until Golden Brown: Once the dough is done rising, lace the loaf pan on the middle rack of the oven and bake for 50 minutes, until the top is golden brown and the loaf sounds hollow when tapped.
- Remove Loaf from Oven: Remove the loaf from the oven and let it cool down for 10 minutes in the pan before removing it to finish cooling on a rack (this will prevent the bottom from getting soggy). If the bottom is not brown enough for your liking, let it bake bottom-side-up for another 10 minutes at 375F.
- Cool Fully Before Slicing: Allow the loaf to fully cool before slicing (this is important as the loaf may disintegrate if it’s still hot when you slice).
Notes
Gluten-Free All-Purpose Flour Blend: I highly recommend using a good-quality gluten-free all-purpose flour blend that is made of lighter flours/starches (such as rice flour, tapioca starch, corn starch, or potato starch) to ensure a fluffier and lighter final texture. I do NOT recommend using gluten-free flour blends that include heavier flours (such as garbanzo bean flour) as that will result in a densier final texture.
Xanthan Gum: Xanthan gum is a replacement for gluten in gluten-free baked goods, and is what helps to bind the ingredients together. If your gluten-free flour blend does not include xanthan gum, make sure you include it to get the best results.
Baking Powder: To make this gluten-free bread light and fluffy, one of the secret ingredients is baking powder to help give the dough extra rise (on top of using yeast). If you are Celiac or gluten-intolerant, make sure to use certified gluten-free baking powder.
Instant Yeast: I like using instant yeast because there’s no pre-activation time required. If you are not using instant yeast, make sure to activate the yeast according to the packet instructions.
Sugar: I used granulated white sugar in this recipe. The sugar is required as “food” for the yeast to feed on and activate it to create the gases required to make the dough rise. By the end of the process, the sugar would have been consumed by the yeast and hence will not make the bread sweet.
Sunflower Oil: I like using sunflower oil because I always have a bottle of it on hand. You can also use other neutral-flavored vegetable oils in equal quantities. Alternatively, if you are not lactose-intolerant, you may also use melted butter in equal quantities.
Apple Cider Vinegar: The apple cider vinegar creates an acidic environment that helps the gluten-free bread dough to rise even more. If you don’t have ACV on hand, you can also use white vine vinegar, rice wine vinegar, or fresh lemon juice.
Almond Milk: I used my 5-minute homemade almond milk for this recipe, but you can also use my homemade cashew milk, or other non-dairy milk of your choice. If you are not lactose-intolerant, you can also use normal dairy milk instead. I find that using non-dairy milk gives the bread a richer taste, but I’ve also made it with water instead of milk and it comes out delicious as well! Make sure the temperature of the milk or water is between 105 to 115F, as the warmth is required to activate the yeast, but if the liquid is too hot, it might kill the yeast.
Eggs: The eggs provide extra structure and also help the ingredients to bind better together. I have not tried making this gluten-free bread recipe without eggs, but if you are allergic to eggs or vegan, you can try using aquafaba or an egg-replacer (please let me know how it goes if you do that)!
Gluten-Free Dough Consistency: Don’t be alarmed when you see that the dough doesn’t resemble normal wheat bread dough. Gluten-free dough will always be sort of wet and shapeless, just like cake batter. In fact, for gluten-free bread to come out moist and fluffy, the dough has to be wet, otherwise, the bread will be too dry.
Pan Size Will Determine the Height of Bread: I like using an 8″ x 4″ loaf pan because the bread rises slightly more in this smaller pan. If you use a larger pan (such as a 9″ x 5″ pan), just note that the dough will spread out more and as a result will not rise as high compared to baking in a smaller pan.
Cut the Bread with Serrated Knife: It’s important to use a serrated knife (knife with a tooth-edge) to slice the bread. Do not use a smooth-edged knife as that may flatten the bread and not cut properly.
How to Store/Freeze the Bread: Store in an airtight container for up to 1 week in the refrigerator, or wrap it in plastic wrap unsliced and freeze for up to 3 months in the freezer. If freezing, make sure to thaw the bread overnight in the refrigerator before slicing and using.
Adapted from: Mama Knows Gluten-Free
This recipe was originally published in August 2020, but has since been republished to include step-by-step photos, recipe notes, ingredient substitutions, as well as clearer text.
- Prep Time: 35 mins
- Cook Time: 50 mins
- Category: Bread
- Method: Baking
- Cuisine: American
I added ground flaxseed and ground chia seed to my recipe and let rise for an hour with a *damp tea towel instead and it created a more stodgy bread like its gluten counterpart. I’ve used this recipe 6 times and the last 3 times with my adaptations and it’s the best bread ever
Hi Celeste! so happy to hear that you enjoy this bread so much – so do we! Thanks for sharing your adaptations, the addition of ground flaxseeds and ground chia seeds sound delicious. Hope to see you around the blog again sometime soon!
Really nice bread thank you
I made my own flour using 6 cups of brown rice flour ( I ground up the brown rice myslef )
2 cups of potatoe starch
1 cup of tapioca starch
1 tablespoon of xantham gum
And used 2.5 cups of that
Would you consider the potatoe starch too heavy ?
It came out fully baked but I took it out after 35 minutes cuz it browned right away
Thank you so much Jesse! So happy to hear you enjoyed this GF bread! If you want to bake the bread a little more and find that it’s browning too much on top, you can simply tent the loaf with aluminum foil (this will prevent the top from browning further), and bake it a little more. As for potato starch – nope, it’s definitely not heavy, it’s actually one of the lighter starches, so your GF flour blend sounds good to go!
Fantastic recipe. It’s indeed soft, with a perfect crumb, slices thinly, domes and browns well. This is my second favorite bread and that is saying a lot. I have made dozens and dozens of gluten free breads. My favorite bread is a recipe I developed that takes a lot of ingredients and is more complicated to make. When I make it, I usually make 5 or 6 loaves, since it’s such a pain to make. I then slice, wrap and freeze most of it. This bread, on the other hand, is super simple. Even a beginner baker could do well with this.
I did make a couple adjustments. I started by using Cup 4 Cup flour. I do not care for King Arthur Gluten Free for bread baking. It just doesn’t make a light bread. I used Glucomannon, instead of the Xanthan. I also used 1 tablespoon Table Sugar & 1 tablespoon Monk Fruit. Other than that, everything else was followed to a T. This is a keeper & if you haven’t tried it, you should.
Happy to hear that Delight – this gf bread recipe is indeed a big favorite and it’s always nice to hear that others love it too! thanks for your sweet comment, and hope to see you around the blog sometime soon!
Hello again Felicia,
Well, I have now made this bread at least a dozen times and your hamburger (and hotdog) buns a few times. I’ve tried a few variations of this recipe.
I’ve even added 1/4 cup ripe Sour Dough Starter a couple times and it comes out great. It makes a tasty, quick sour dough bread.
One thing I have noticed though, is that this bread and the hamburger buns turn out BETTER with Cup 4 Cup gluten free flour, than with King Arthur gluten free flour mix. It tastes ok with King Arthur’s, but if you FREEZE, the bread, it dries out a lot more with King Arthur than with Cup 4 Cup. I realize that Cup 4 Cup and the Premium Blends are TWICE the price as King Arthur. At least, they are in the United States. I only buy Cup 4 Cup and the other premium brands, when I can get them on sale and aim to get them at 40% off.
When a good sale comes up, I sign up for that site’s newsletter and sometimes they’ll give you a 20 to 30% off code, you can use on top of the sale. Amazon has “Subscribe and Save”. I recently purchased 4 bags of Cup for Cup flour at 40% off. You can then UNSUBSCRIBE at any time, without getting the next shipment. I’ve done that a few times with different purchases. You’re not supposed to do it on the same item twice, but I’ve used it on large boxes of toilet paper, Kleenex, large boxes of baby wipes, cooking supplies, etc. Sometimes the percentage off isn’t very much, so you have to keep checking, until a high percentage off comes on. I saved $18.40 on a $46 purchase on Amazon and more at Vitacost.com It pays to find sites having sales on what you use, then sign up for their newsletter, where they’ll usually send you a coupon code for more savings.
I have some bags of King Arthur BREAD FLOUR coming, so I’ll see if that works better on the breads, than their regular gluten free flours. I’m going to try your Potato Bread today as dinner rolls. Also, I have some extra apples, so I’m trying your Apple Bread Recipe, too. Thank you for the great recipes.
Hi Delight, as always, thank you so much for your detailed feedback! Plus, great tip on how to get Cup4Cup flour at a better price! 🙂
This bread is so good!! I used 6 tbs aquafaba instead of eggs and it worked very nicely! also used active dry yeast and i didn’t feel like activating so i just mixed it with the warm milk and added it that way and it turned out great! also got scared of it being too wet so i added 1 and 1/3 cups of milk instead. going to use this recipe everytime, the bread is a million times better than GF store bought, the texture and flavor are so good!!
YAY! So happy to hear that you enjoyed this gluten-free loaf Cassidy, and thanks for sharing the substitutions you made! Happy baking, and hope to see you around the blog again sometime soon!
xx,
felicia
I followed the recipe using cup 4 cup flour. I cut the water back 1/4 cup and didn’t let it rise the full 30 minutes. At 50 minutes it was very brown on top and sounded hollow when I tapped on it but the top fell and the sides caved. Wondering if I should use less yeast and use a 9 inch loaf pan?
Hi Gaile, I recommend using a gluten-free all-purpose flour (instead of a measure for measure flour like Cup4Cup). Also, it sounds like your bread dough was a little too wet, so I would reduce the amount of water a little more. The humidty/temperature of where you live, as well as the type of gf flour blend used can all affect how the loaf turns out. But in my experience, as a general rule, the dough should not rise too fast, and once risen, it shouldn’t wiggle around too much. If it wiggles too much, the top of the loaf will probably fall in once baked.
Hi, I wanted to ask you why this bread came out very wet and yellow in colour. It rose nicely, I baked it for 60 min but after it cooled down the middle fell in and inside was wet and gooey. The crust was brown already so I didn’t want to bake any longer. What am I doing wrong? I must say I used my own gluten free flour blend which contains Rice flour, corn flour and potato starch.
Hi Laura, I’m thinking that maybe your bread dough was too wet, that’s usually the case when the middle collapses after baking. Depending on the flour blend and the humidity where you live, it could result in a very wet dough. I would reduce the amount of water or liquid by 1/4 cup. This will result in a less wet dough that may take longer to rise, but should keep its shape even after baking – and the inside should be cooked. If you find that the bread is still not cooked inside, you can bake it for another 10 minutes.
I love this bread! I’m no baker, and it came out perfect, fluffy, moist and delicious the first time I made it! I’ll make it over and over again, and nice to find such yummy bread after my celiac diagnosis. You don’t have to miss out on yummy bread…it’s wonderful!
So happy to hear that you loved this GF bread Jessie! And yes, being Celiac or gluten-intolerant doesn’t mean you have to miss out on yummy bread!
Hi! I need help! What could I be doing wrong? My bread is splitting down the middle. I’ve made it twice now. My husband loves how soft and fluffy it is. He says it’s the best tasting out of all the breads I have made too..
But it just splits down the middle and then sinks down into a pile.
The first time I thought maybe I over proofed it because I forgot to preheat the oven and so the bread rose really high while I was waiting for the oven. That time it exploded over the edge.
Second time I put the bread in the oven after 3o minutes.
Our kitchen is usually 75 degrees. Could it still be that it’s over proofing? It rises high and gets all weird and then splits.
I am using a cup to cup flour with zanthan gum. Basically the same ingredients as the flour recommended.
Any tips?
Hi Kare, I’m guessing that your bread dough might be a little too wet (this depends on the humidity of where you live as well as the GF flour blend used), so maybe you can use 1/4 cup less water and let the bread dough rise until it just reaches the top of the pan. Bake as per the recipe, and the loaf shouldn’t split down in the middle. Let me know how it goes!
xx,
Felicia
Thank you for this great recipe! This was the first gluten-free bread that I’ve ever made and it was fantastic. I’ll definitely be baking more of this bread. It was so easy to make and your recipe was so easy to follow.
Hi Vicki!
Makes me so happy to know that your first loaf of GF bread turned out great! GF baking isn’t always easy, there’s usually a steep learning curve, so I’m glad your first experience worked out well! 🙂 Thanks for your lovely comment, and I hope to see you around the blog sometime soon!
xx,
Felicia
I’ve been tired of eating tasteless, too dense GF bread so I just did my first attempt with homemade using your recipe. It turned out amazing. Absolutely delicious. Detailed instructions made it easy for beginner or experienced cook. Felt like there was no way to fail. Thank you and keep these delicious GF recipes coming!
Hi Maggie! I’m so happy to hear this! Glad you enjoyed this gluten-free bread, and that you found the instructions easy to follow for your first ever loaf of homemade bread! Hope to see you around the blog again sometime soon!
xx,
Felicia
This receipe is amazing. I am so delighted with my loaf! It actually looks and tastes as good if not better than normal bread. I even had my family and friends try and they were impressed. I have tried and experimented with so many receipes maily in the breadmaker, which dosnt have a gluten free function. I wasnt keen to bake in the oven as it all seemed too hard, but 30mins is not long to wait for the dough to rise. I have made 2 more loaves to freeze while Im on a roll. I used egg replacer instead of egg as I have an intolerance to chicken eggs/dairy and gluten and it worked wondefully. Thank you so much for this receipe.
Caroline, Perth, Western Australia
Hi Caroline! So happy to hear you loved this bread 🙂 It’s definitely one of our faves, and the fact that it’s really easy to bring together means you can have a homemade loaf anytime! Thanks for your feedback, and I hope to see you around the blog again sometime soon!
xx,
Felicia
I love your recipes!! Made this last night and its very moist, soft, and tender! Thank you so much!!! 🙂
So happy to hear that, Glad you enjoyed this bread! 🙂 Hope to see you around the blog again sometime soon!
Hi its me again Kira. My yeast was not expired and got foamy when i tested it. I don’t know what i did wrong. It rose when i proofed it but when I baked it , it went down to half it’s size.😞
Hi Kira, if this is the case, then maybe your bread dough was too wet. Reduce liquids by 1/4 cup, so the dough will take a longer time to rise, but will be more sturdy. Also, don’t let the dough rise to more than the top of the pan. Hope this helps!
I made this today with a few substitutions- the finished product is a nice yellow color. Baked this in my Zojirishi machine. When the cycle was done, it needed a little more baking time, so I popped it in a 350F oven for 10 minutes- came out really well
substituted 1 cup of the regular flour with millet flour
substituted xantham gum with 2 teaspoons pf psyllium husk powder
Hi Leta! YAY! Glad it worked out well in your bread machine, and great idea on popping the finished loaf in the oven to finish baking it a little more!
So happy it worked with 2 teaspoons of psyllium husk powder instead of xanthan gum 🙂
Can this recipe be used in bread machine. What settings should be used
Hi Sonja! I don’t own a bread machine, but I believe you should be able to make it in a bread machine using the gluten-free setting.
I will let you know how it turns out. Thanks
Most welcome! Hope you enjoy this loaf as much as we do!
The bread turned out great using my bread machine that has a gluten free setting! My husband liked it also. It was moist, not dry. Perfect! Thanks for your recipe ideas. Looking forward to trying the pie crust.
Sooo happy to hear that it worked in the bread maker Sonja! YAY to GF bread that’s not dry! Hope you’ll enjoy the pie crust next. See you around the blog again sometime son!
xx,
Felicia
I followed the recipe to a t, but my bread did not rise at all. Do you know what i might have done wrong
Hi Kira, if your dough did not rise at all, it could be that your yeast was expired. In that case, I would buy a new unopened packet of yeast (and to test if the yeast works by mixing it with warm water and sugar, then leaving it for 5 minutes in a warm draft-free place. It should become foamy after a few minutes if the yeast is working).
Hello, your recipe sounds great but xanthan gum makes me ill. I have corn starch, unflavored gelatin, golden and regular flax seeds, and ground chia seeds. Which would be the best alternative? I will be using King Arthur all purpose flour. I have only tried making GF bread once and had the same problem as some others, it did rise but was gooey in the middle. Can I start off with less liquid?
Thanks so much
Hope your still getting comments!
Hi Sharon! Can you do psyllium husk powder? Use 2 parts psyllium husk powder for every part xanthan gum. Hope this helps!